
 We best know PowerPoint with its interactive presentations that are typically used at meetings where you have one person (the presenter) who shows a slide and tells about it. When he is finished, he uses the mouse or a presenter stick to click and move to the next slide. That is how most people use PowerPoint slideshows.
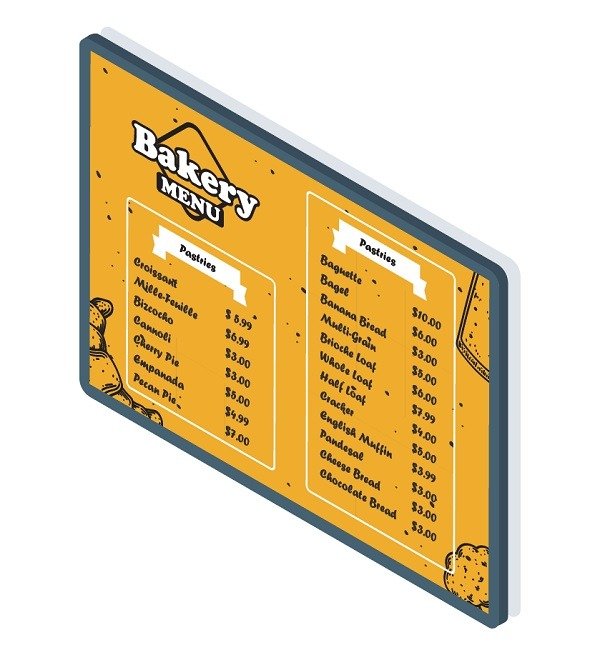
But there is another use of PowerPoint. Non-interactive and self-running slideshows, without presenters. Think about screens with advertising in shops, information at banks, way-finding at museums, menu boards at takeaway restaurants, or train information at stations. Yes, all these presentations can be created with PowerPoint too, but how can you create a slideshow that runs continuously? Follow me.
Transitions
Not really needed for continuous slideshows, but transitions can best be set on your slides for viewing pleasure. Without transitions, you get immediate changes from one slide to the other. With transitions, you can choose an animation effect when advancing to the next slide of the presentation.
Select a slide and click the Transitions tab. Choose a transition from the list of transitions. At this moment, the Office 365 version of PowerPoint has 48 transitions. Personally, I would select one transition effect for all slides as that looks more professional and not chaotic. But when wanted, you can set a different transition effect for every slide.

 Expert tip: Most transitions have more options that you can choose from. So after choosing your transition, click the Effect Options button for variations.
Here you will find some more options and variations of the chosen effect.
Also, play with the Duration! Do not always use the default time. Dare to transition for a longer period and see how that looks.
Timing
With this setup (continuous slideshows) no one is clicking to advance to the next slide. So we need to set a time per slide for how long the slide is shown. Click the Transitions item and look at the Timing group. By default, the slide is set to advance with only one mouse click.
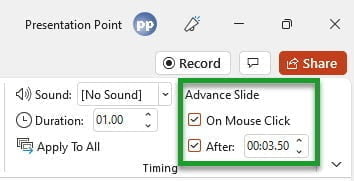 Check the After option and set the duration. The time to show a slide has 3 parts: 00:00.00. The first 2 digits are for the number of minutes. The middle 2 digits are for the seconds, and the last 2 digits are for the seconds in hundreds.
A duration of 00:10.00 will show a slide for exactly 10 seconds. A value of 03:15.00 will use this slide for 3 minutes and 15 seconds.
Optionally you can uncheck the On Mouse Click option.
You can set a different duration per slide individually, or click the Apply To All option to copy the transition and timing options of the current slide to all other slides. Take into account that some slides might have more and longer texts, and assume that everyone is reading the text for the first time, young and old.
Set Up Slide Show
With the settings described above, the slide will advance automatically, without user interaction, but there is one problem: it will end the slide show after showing the last slide of the presentation. We need to repeat the slides forever!
Click the Slide Show menu option in PowerPoint, and then click the Set Up Slide Show button. At the Show type, there are 3 options.

- Presented by a speaker (full screen)
- Browsed by an individual (window)
- Browsed at a kiosk (full screen)
The first option Presented by a speaker is the default option and is good for most (interactive) presentations. For our use, of the continuously and forever repeating slideshow, we need to select the Browsed at a kiosk option (option number 3).
When option #3 is selected, then all options that we need are selected. The option to loop continuously until ‘Esc’ is selected automatically. Also, the option Using timings, if present is selected automatically as well. Click OK to close.

Ending Slide Show
Start the slide show on your computer or television screen. It will run forever, and your potentially set screensaver will be disabled so that it does interfere with your slideshow. Make sure that your computer or laptop does not go into sleep mode. Turn off hibernation for this purpose.
If you want to end the slideshow, just hit ESC on your keyboard.
Tip for Professionals
When you want to show your slideshow on a television screen at your shop, office, or restaurant, then you can manually start the slideshow on a computer. But when you have multiple television screens, a larger plant or factory, or maybe multiple locations, then you want to distribute updates to your content in an easy way.
 You don’t want to copy the updated file to every computer and restart the slideshow. No, you probably want to automate this process where you can send your updated presentation to all remote screens with a single click. Or maybe you need scheduling so that you can schedule when what is shown on the screens. For those cases, we at PresentationPoint, have some options for that; iPoint and SignageTube.
We have our iPoint product which is typically used on-premises and is using a computer that is connected to a television screen. Here you even have the option to use our DataPoint technology to show real real-time data on your screens. Think about auctions, flight information, resource allocations, ongoing and scheduled events, etc.
And as for every good product, we also have a cloud version of this called SignageTube. With this, you use a browser to manage all your screen content. Upload your presentation via that browser. At your shops, where you use a smart TV with no computer attached. From the Google Play Store, you download the SignageTube player app, and your uploaded presentation will run as a movie on your smart TV, just like Netflix. This is a great solution for advertising needs.


