Thank you for installing iPoint
Important information: Bookmark this page!
Your First Steps
1
Run the iPoint player application for the first time and let it connect to the iPoint server.
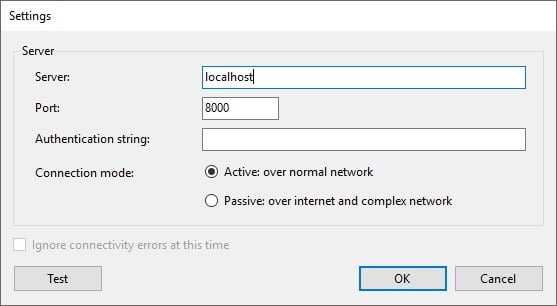
- Enter the computer name or IP address of the computer where the iPoint server component is installed. You can use localhost when the iPoint server is installed on this same computer.
- Also check the port number for all iPoint communication. Default is 8000.
- Test your connectivity for success and click OK to commit.
2
Optionally, you might get a Windows Security Alert about this new communication. If so, just click the Allow access button. For expert users, you can enable communication for the iPoint port, default 8000.

3
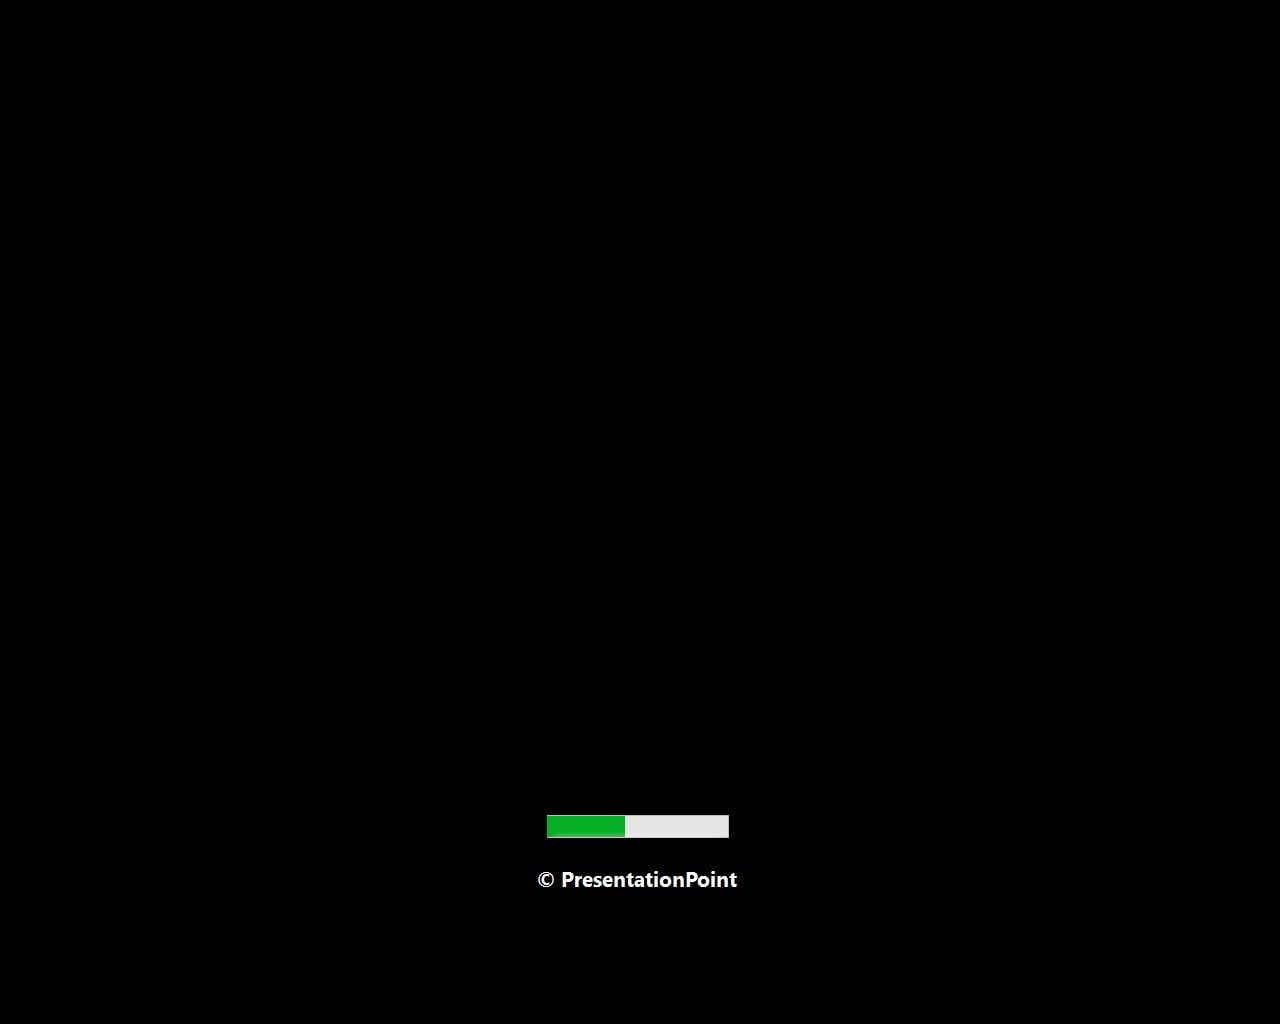
The player application is now starting and establishing a connection to the iPoint server. For a new player, with no playlist assignments, the player will remain black since there is nothing to play at the moment.
4
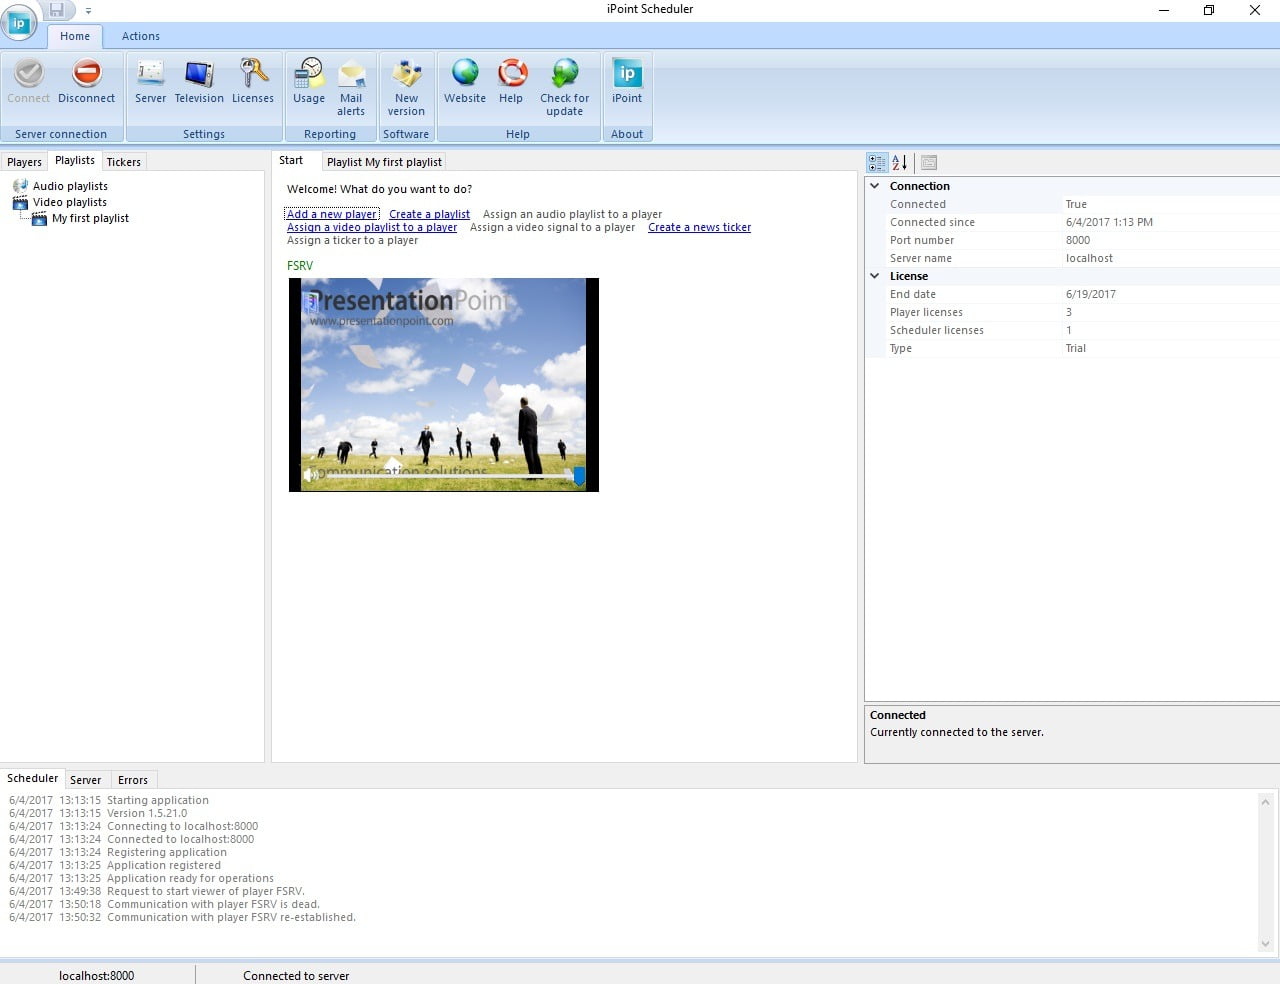
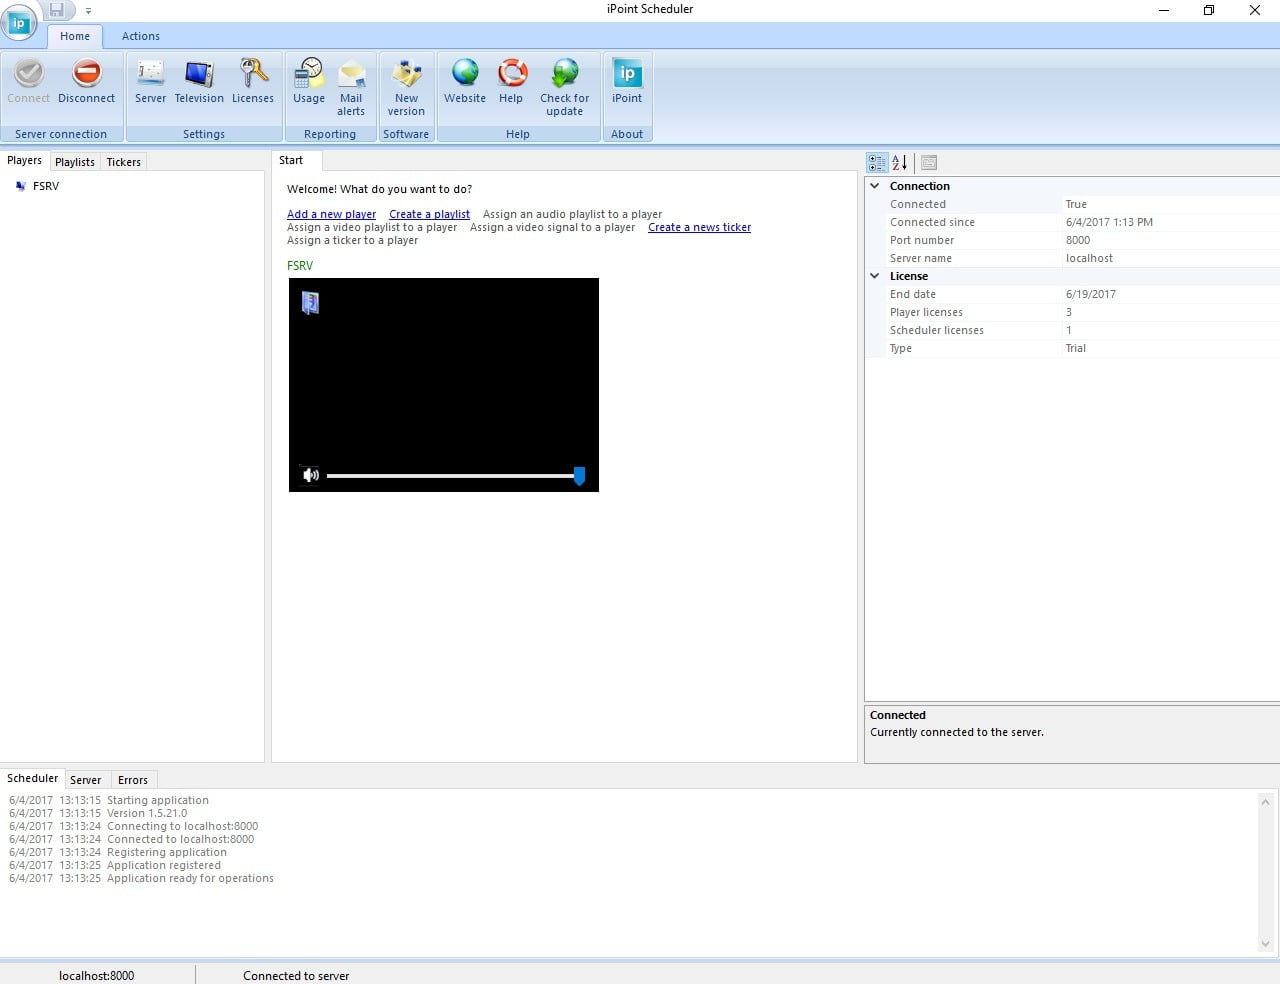
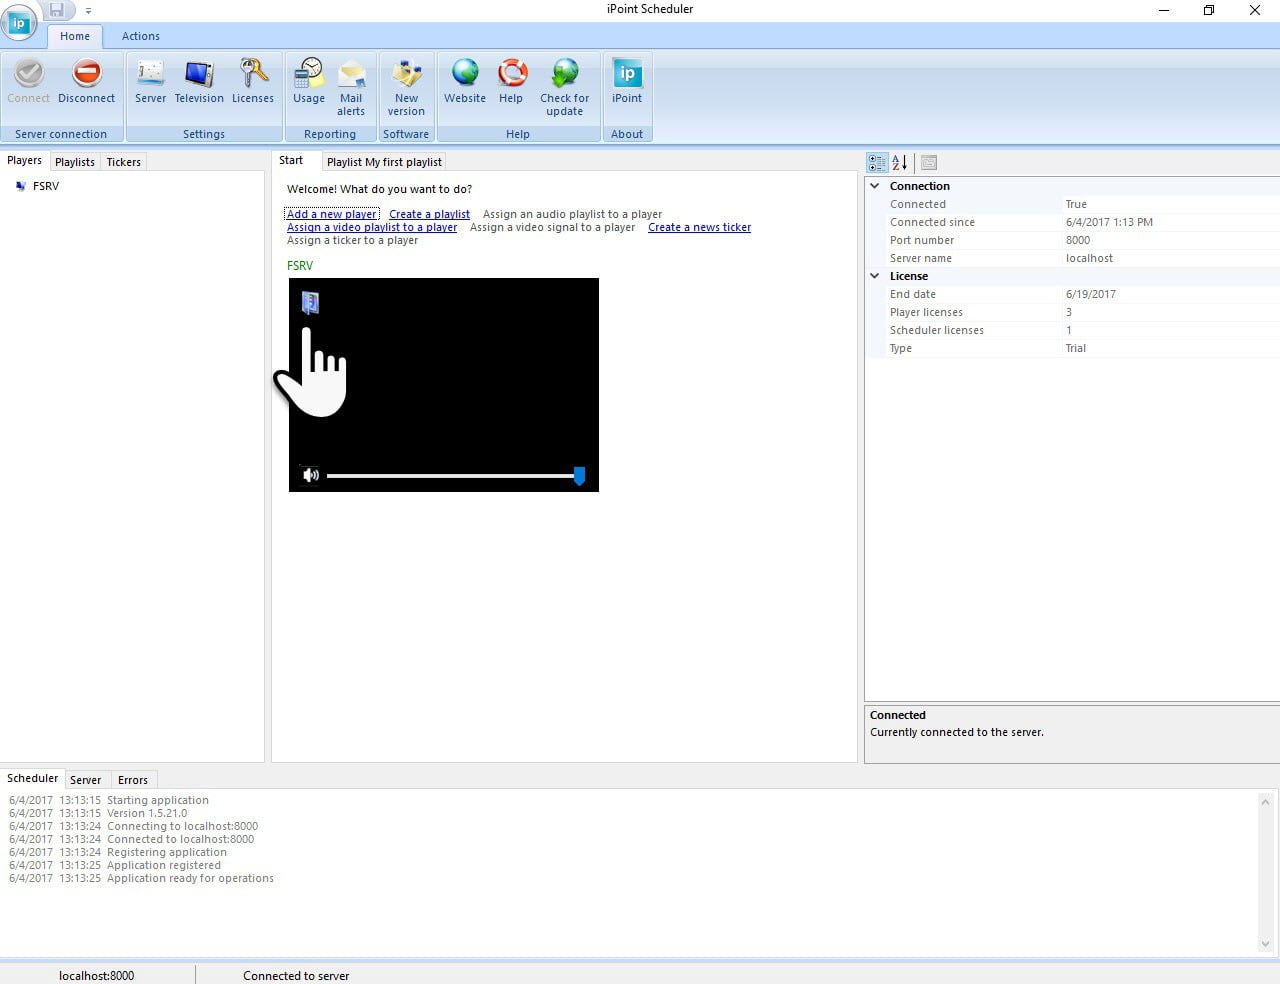
Now, probably on the same or maybe another computer, start the Scheduler application. Connect with the same information; iPoint server computer name and port number, allow communication by accepting the Windows Security Alert. Finally you arrive at the screen like this.
You see your first player computer connected. The name is in green when it is running and connected to the server. Otherwise the name is in red when there is a communication problem.
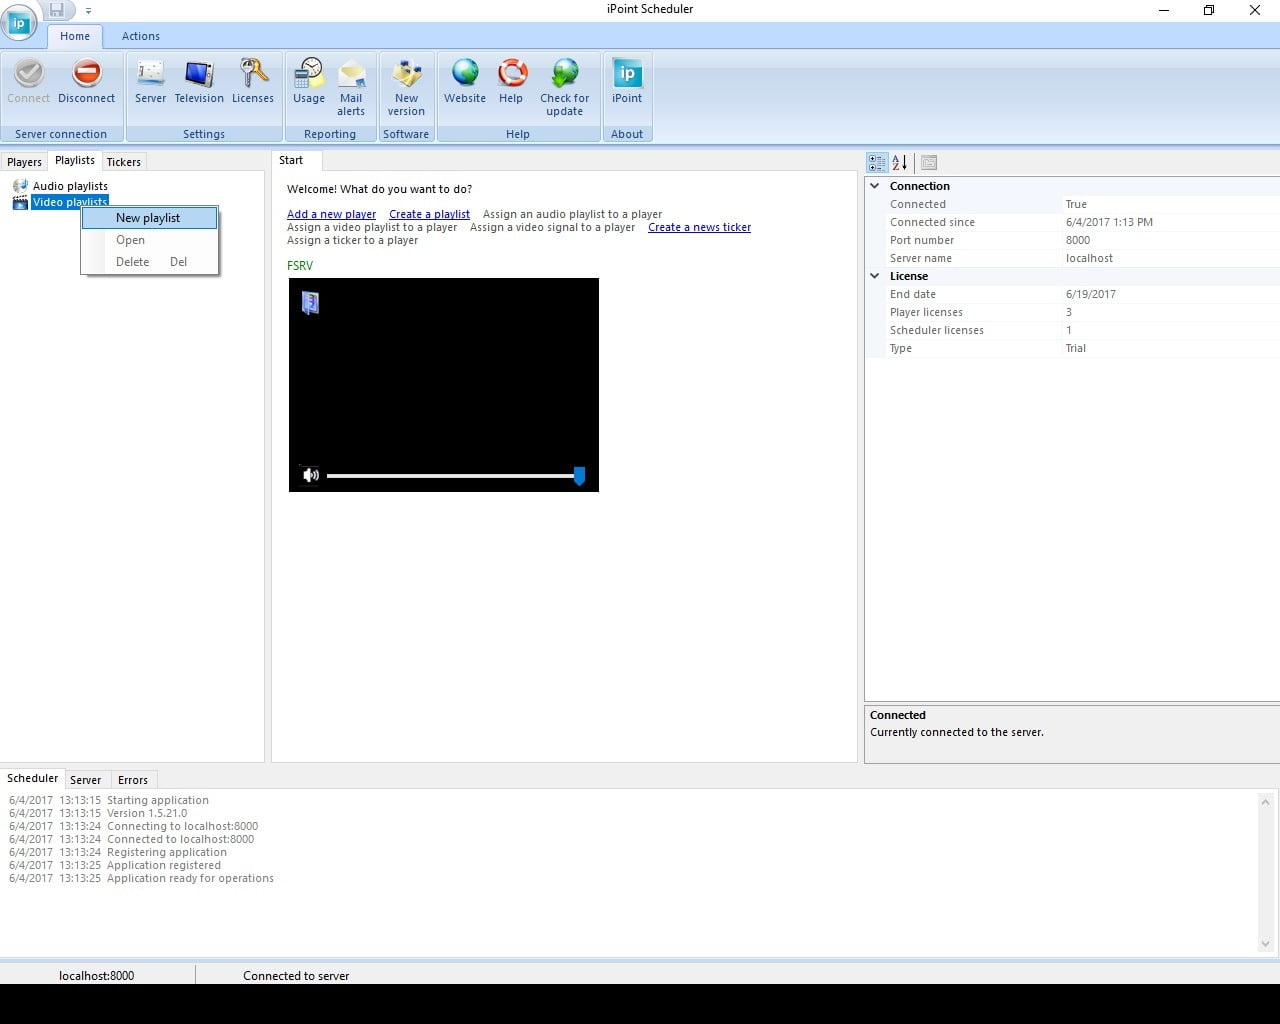
5
We need to create a playlist. Click to open the Playlists tab. Right click the Video playlists node, and choose New playlist from the popup menu.
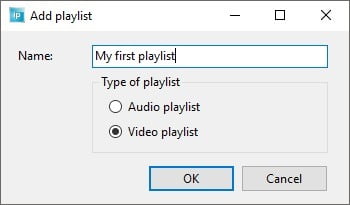
6
Give the playlist a name and click OK.
7
Click the Add button and browse to select a few files for your playlist. These files can be images, videos and PowerPoint presentations.
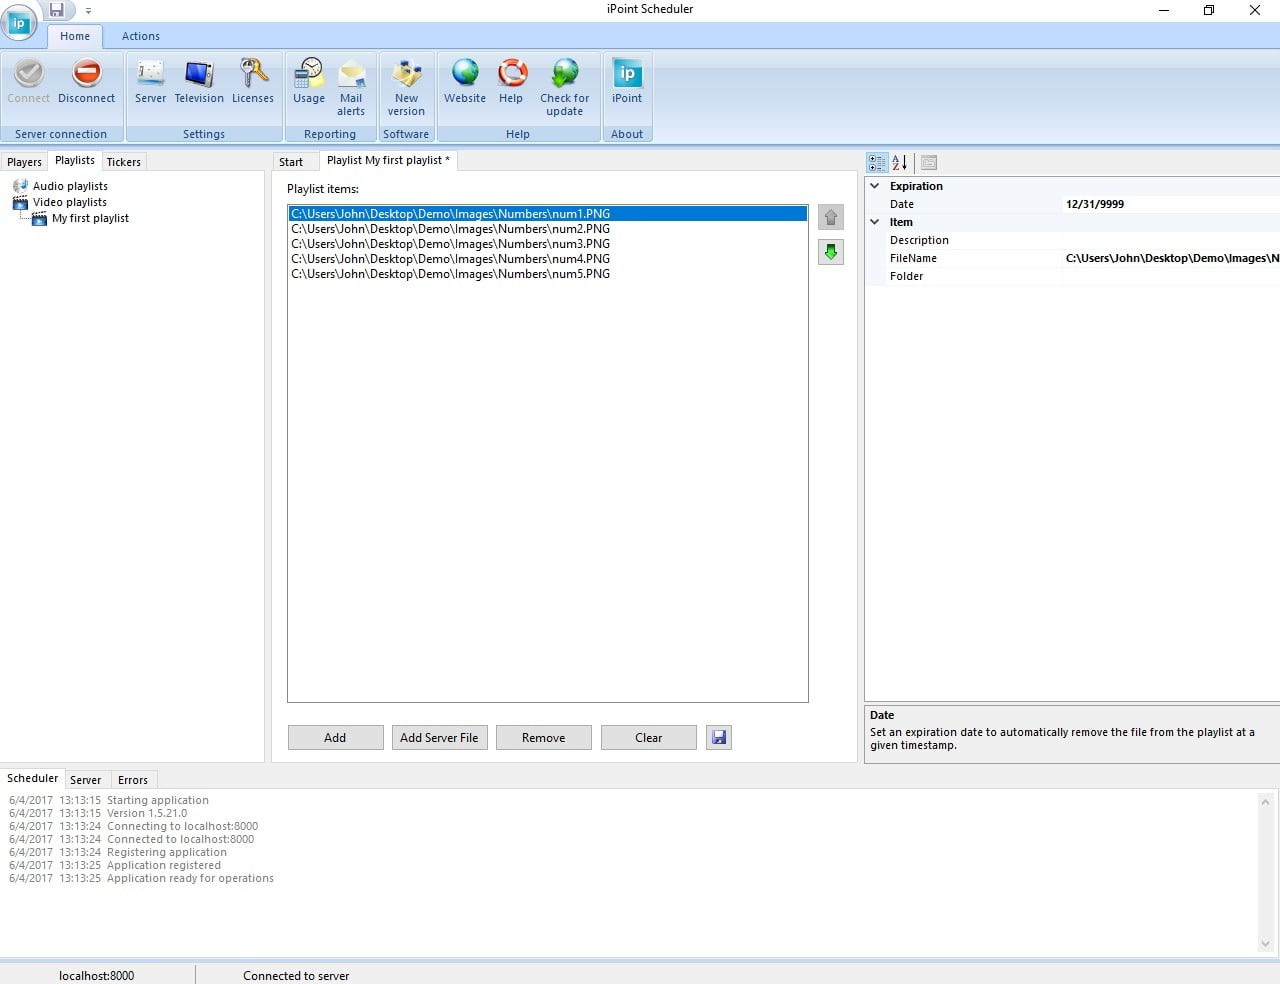
8
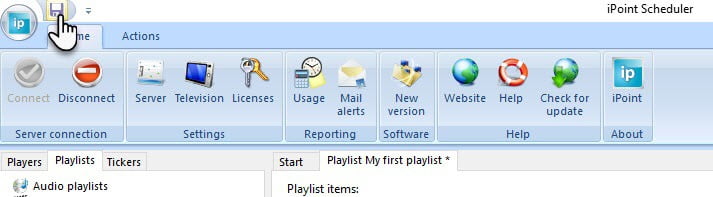
The scheduler application signals that the playlist definition was modified and needs to be saved in order to publish the changes.
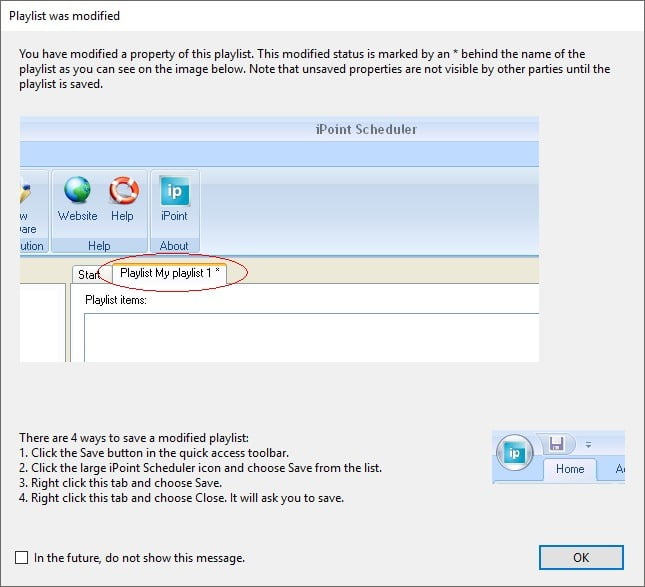
9
There are a few ways to save a playlist, but the easiest way is to use the floppy or save icon at the top, next to the iPoint button.
10
Click to open the Start tab again and click the Assignments icon of your player.
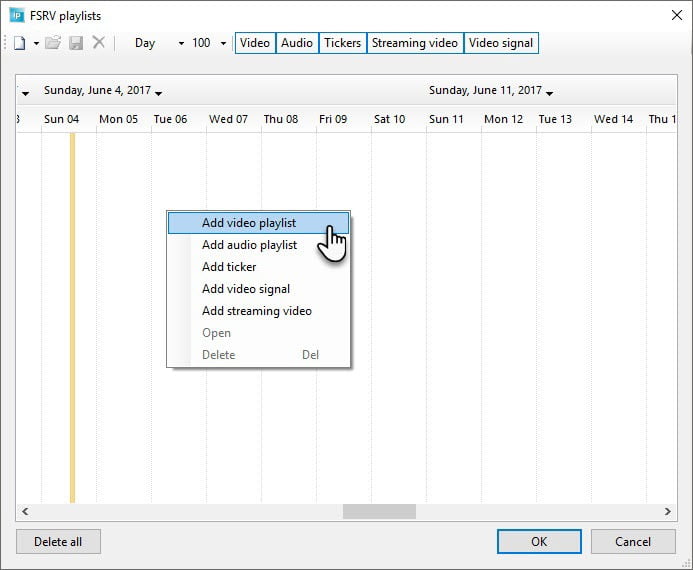
11
Right click the calendar and choose Add video playlist from the popup menu.
12
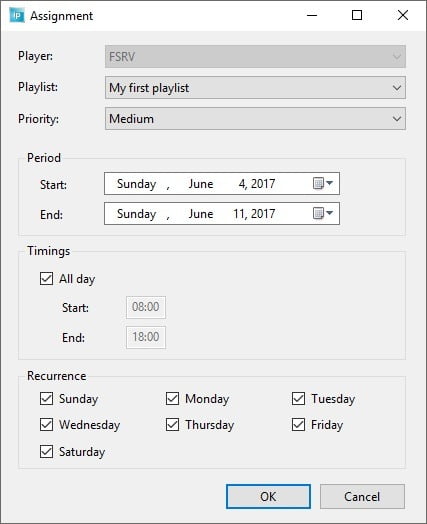
Here are the playlist assignment properties. You can choose which playlist to assign to this player, set the priority, choose when the playlist starts and stops, days of the week and more. Choose your preferred options and click OK.
13
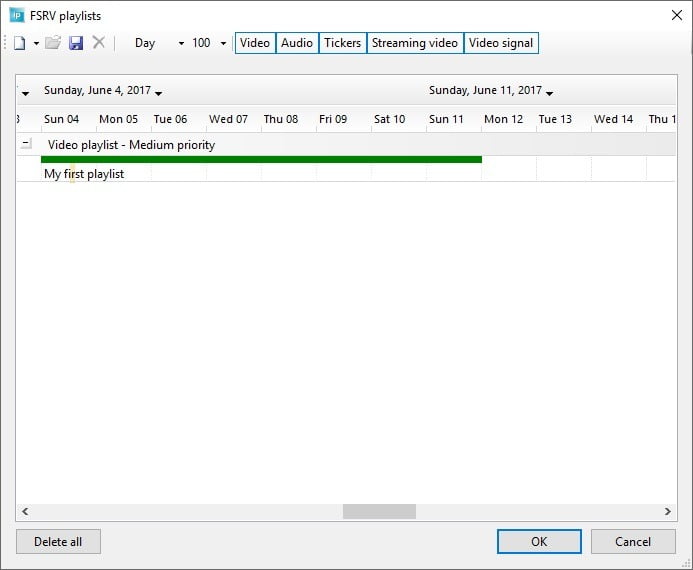
At the overview, you can see that this playlist is scheduled for playback. You can add more and different playlists to the schedule.
14
The player will receive the playlist and its files and will start playing the playlist. At the scheduler, you can see live thumbnails of what is displayed at the remote players.