
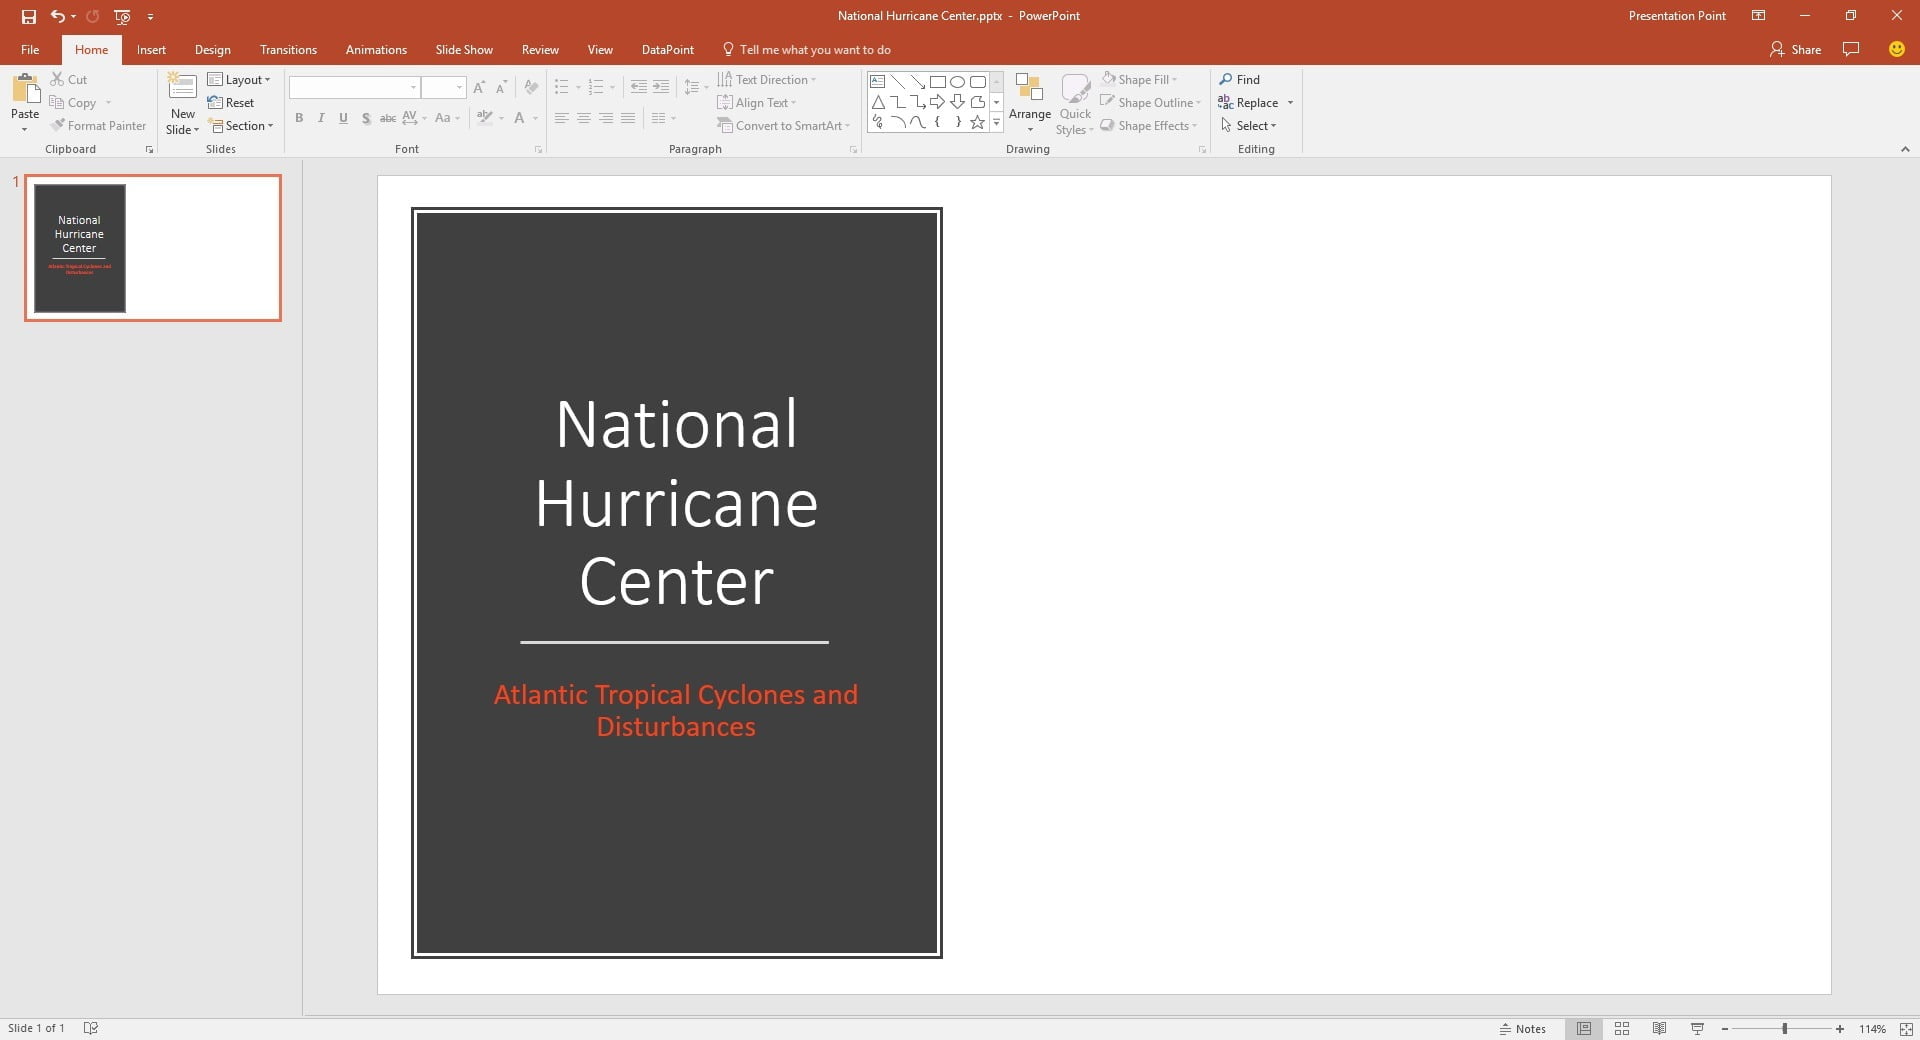
Introduction
In today’s blog article, we will show you how you can insert and link a picture of a web site into your PowerPoint slide. Often, we are asked to display weather maps or traffic maps on an information screen. We will show you the easy steps on how to do this.
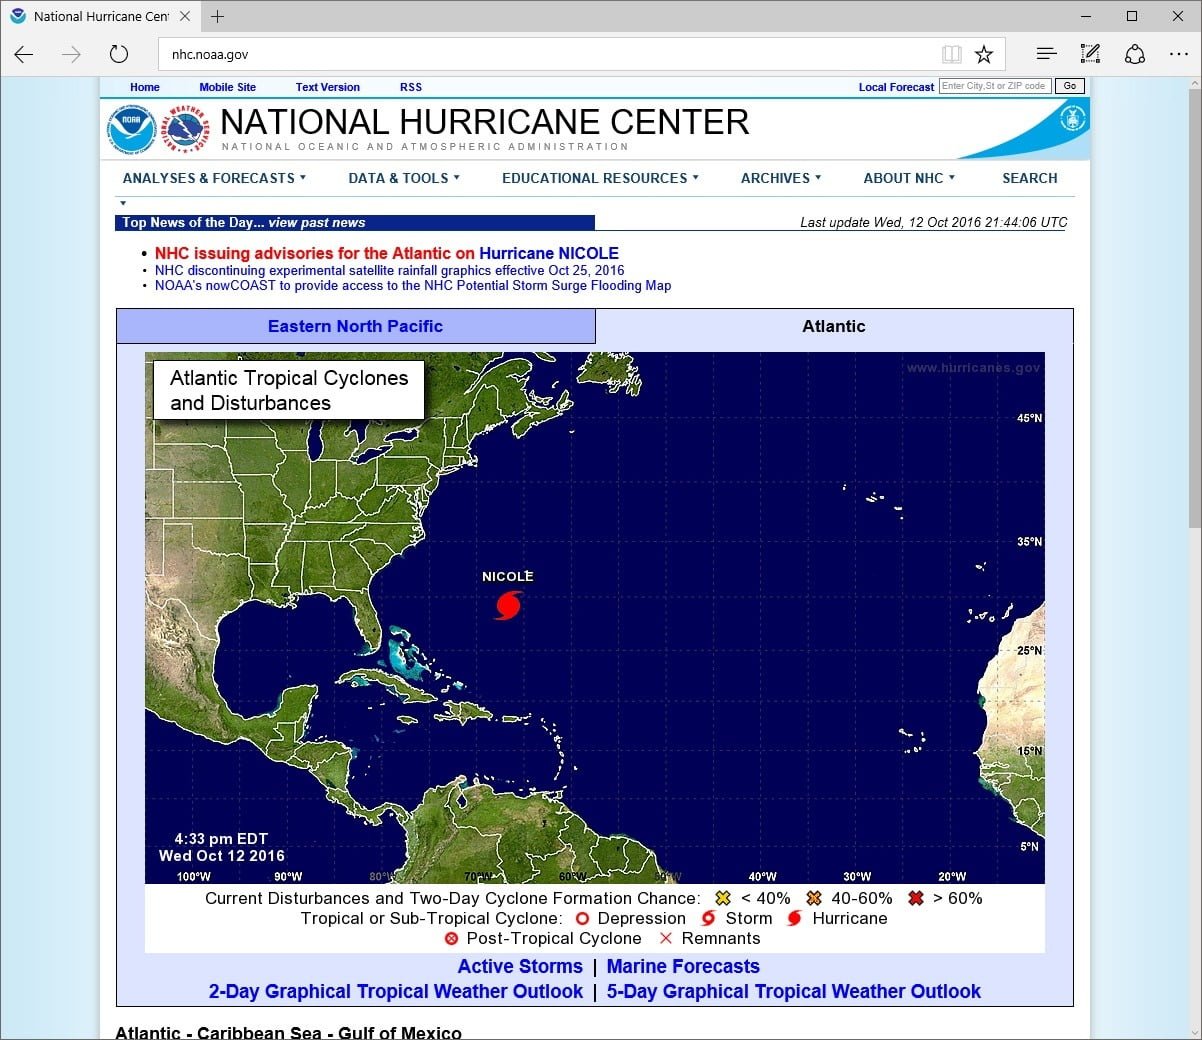
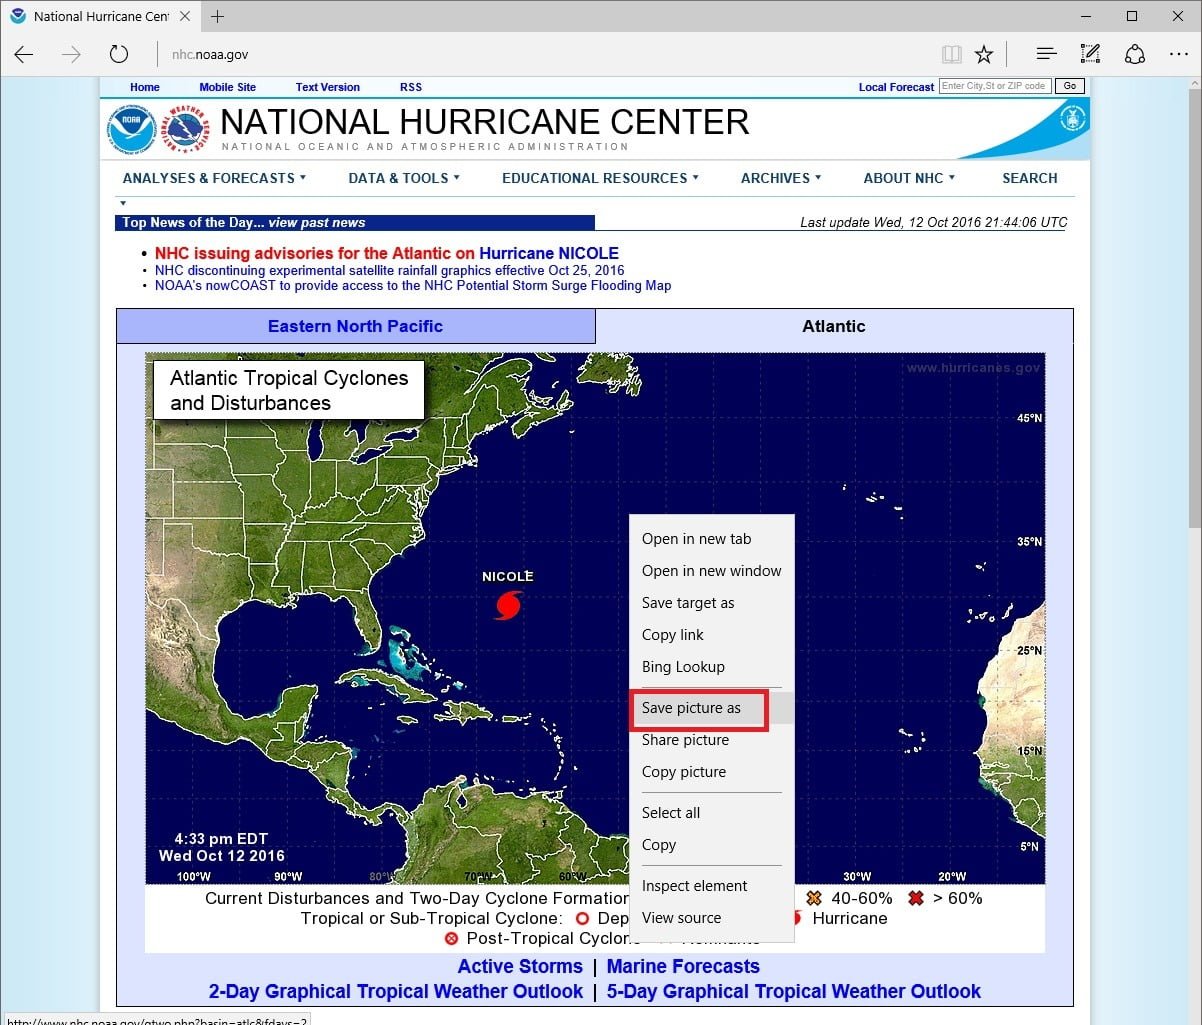
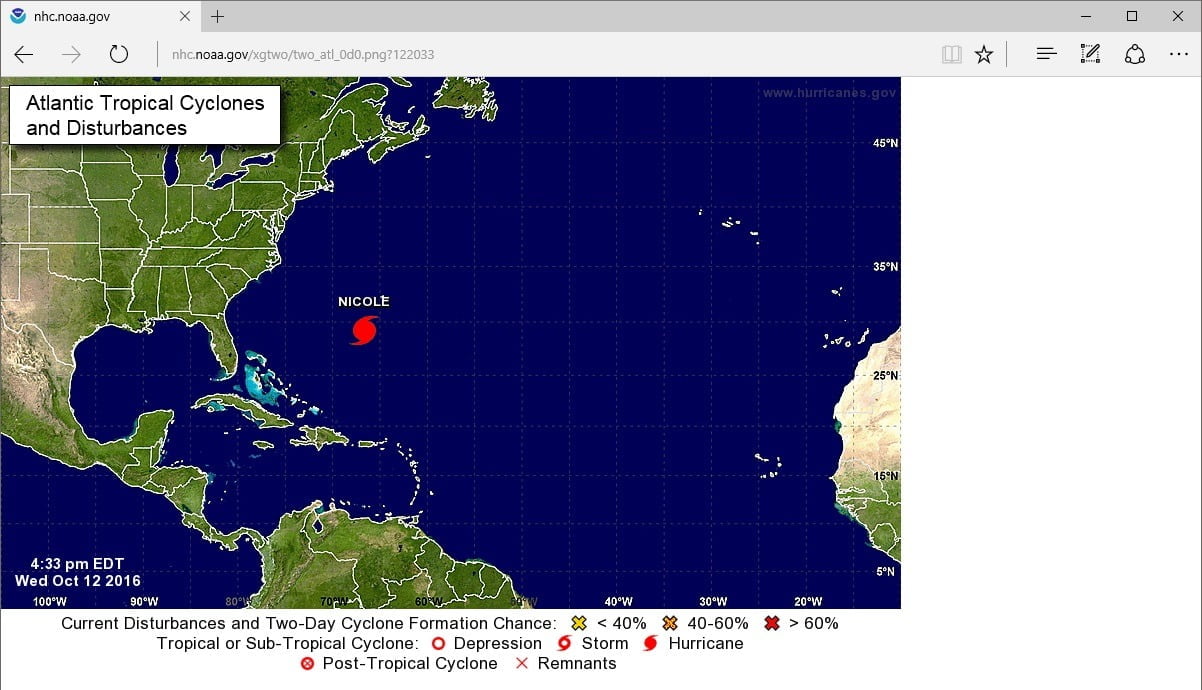
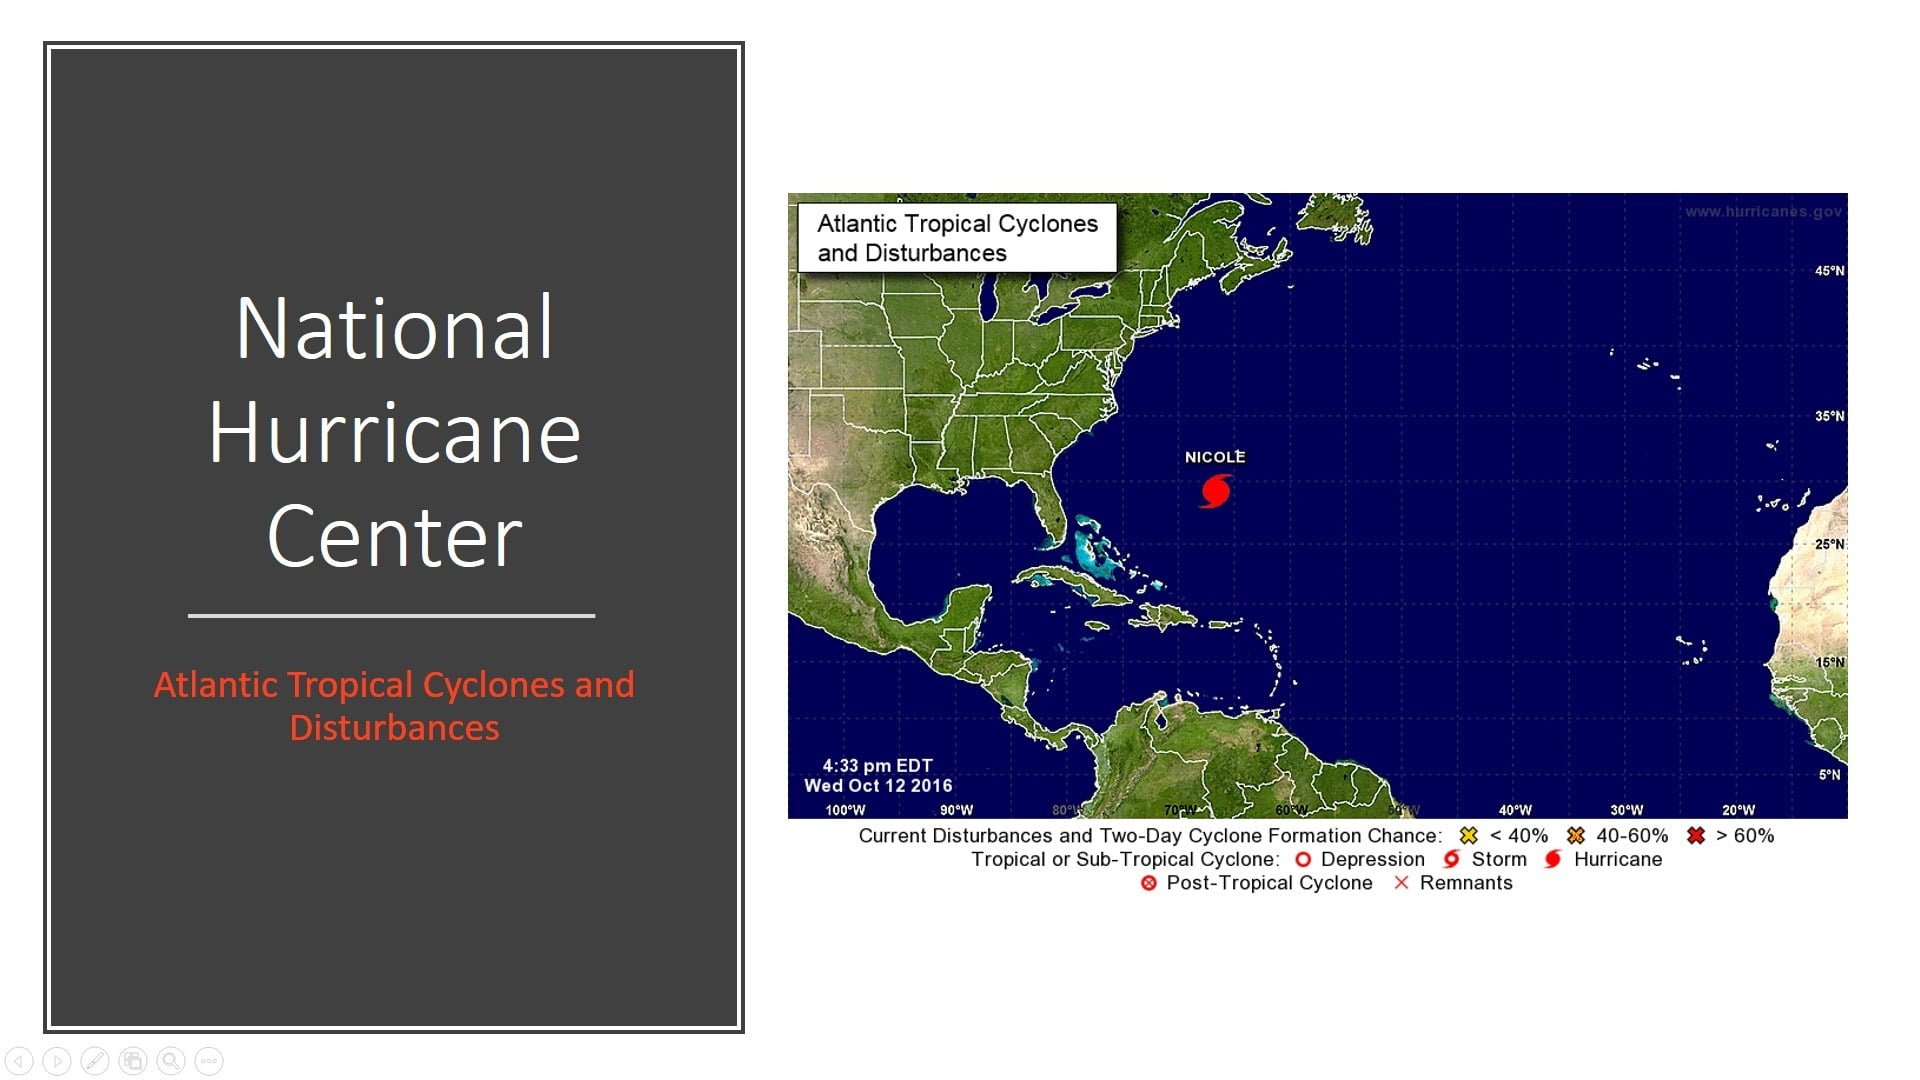
Let’s use a web site that shows an information about hurricanes. Open your internet browser and visit the National Hurricane Center at http://nhc.noaa.gov. Then you will see an image with the current hurricane information and warnings. This could also be a Doppler weather map. You can use any image. The owner of the website is regularly updating this image, to reflect the latest situation. For hurricanes, but this could be real-time traffic information as well.
The copy-paste method
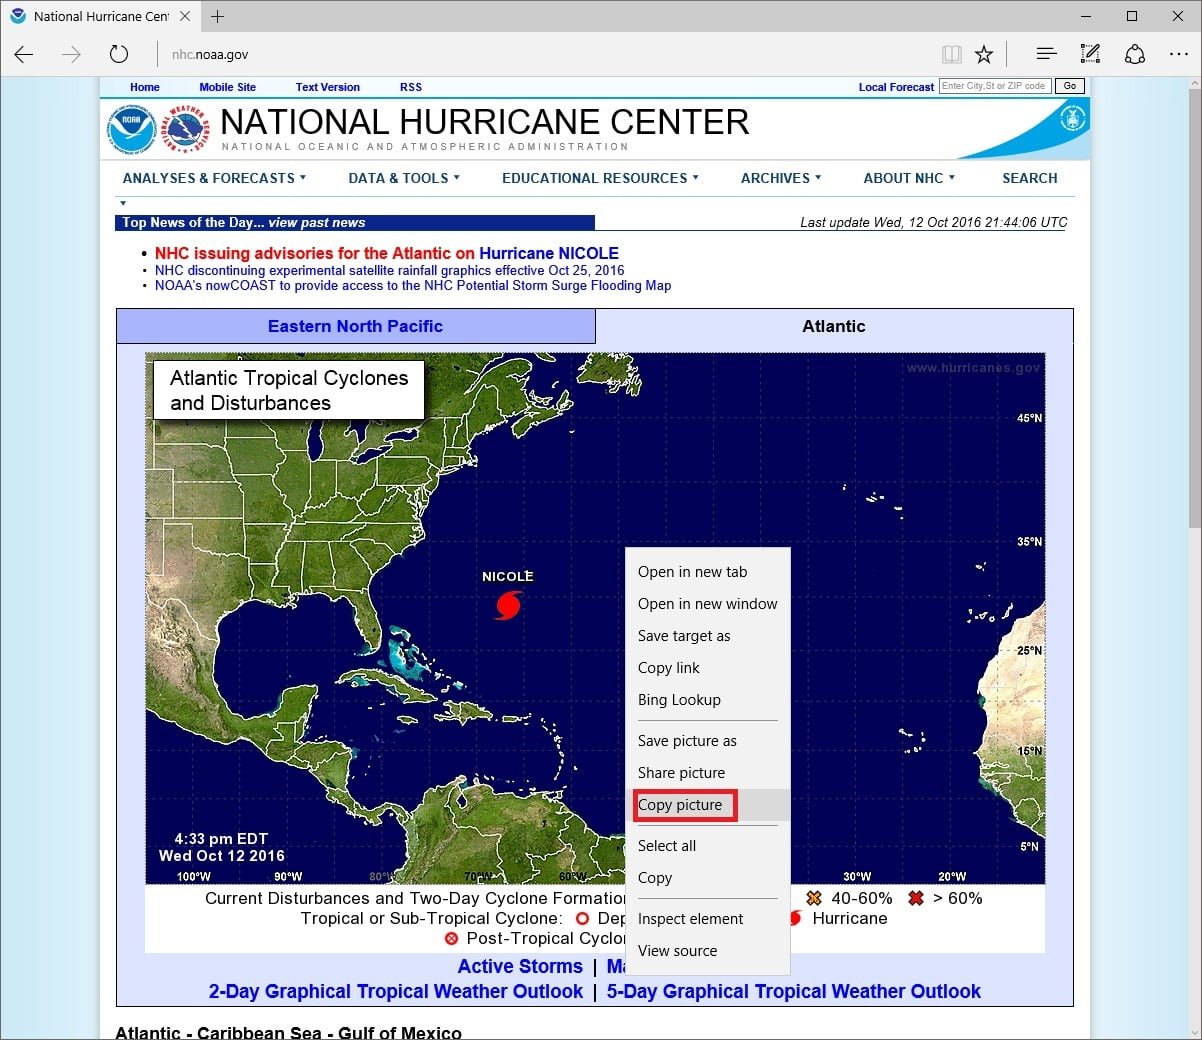
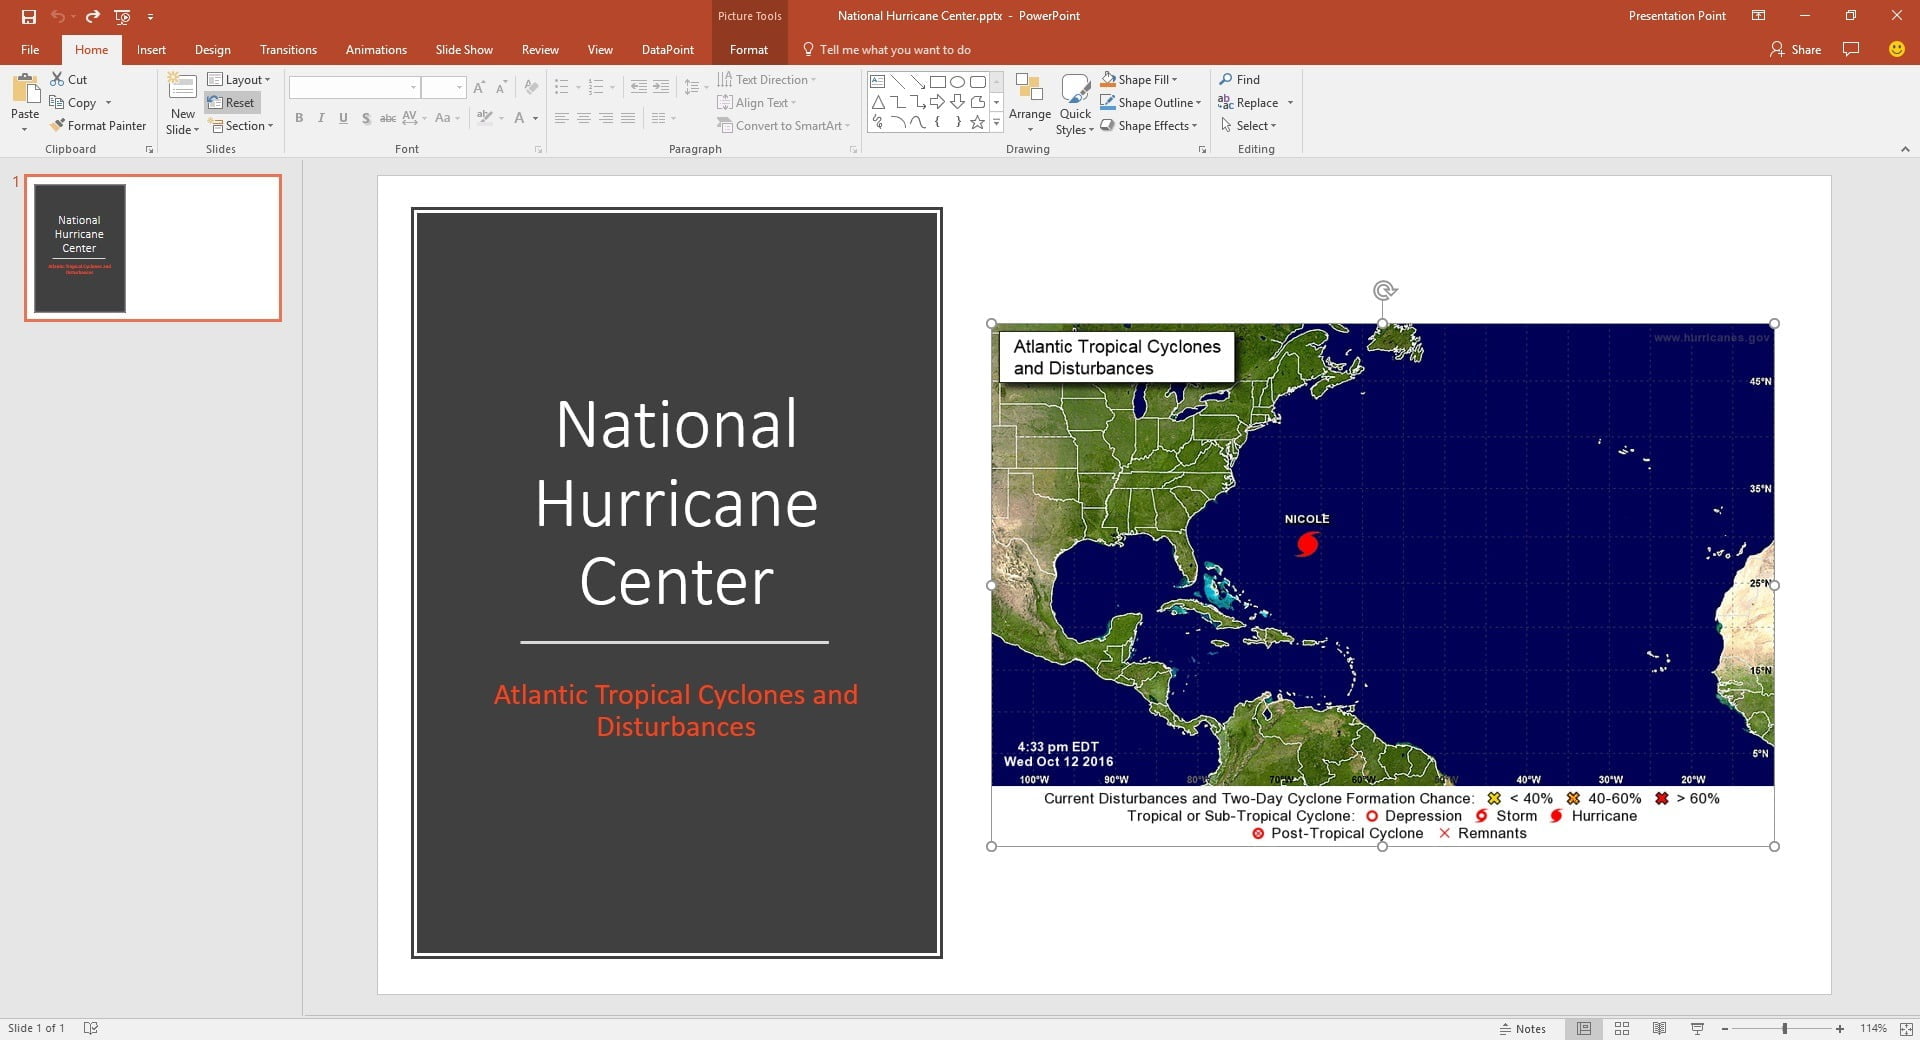
Let us first demonstrate the easiest way to copy an image for our PowerPoint slide. Right click on the desired image on the web page and choose Copy picture from the pop up menu. Note that this here, is for the Microsoft Edge browser and this might vary, based on the internet browser that you are using. The image is now copied into memory.
How to go for a linked image?
That is not what we want! We want a live internet image on our slide for the latest up-to-date information, since we are running a real-time information display.
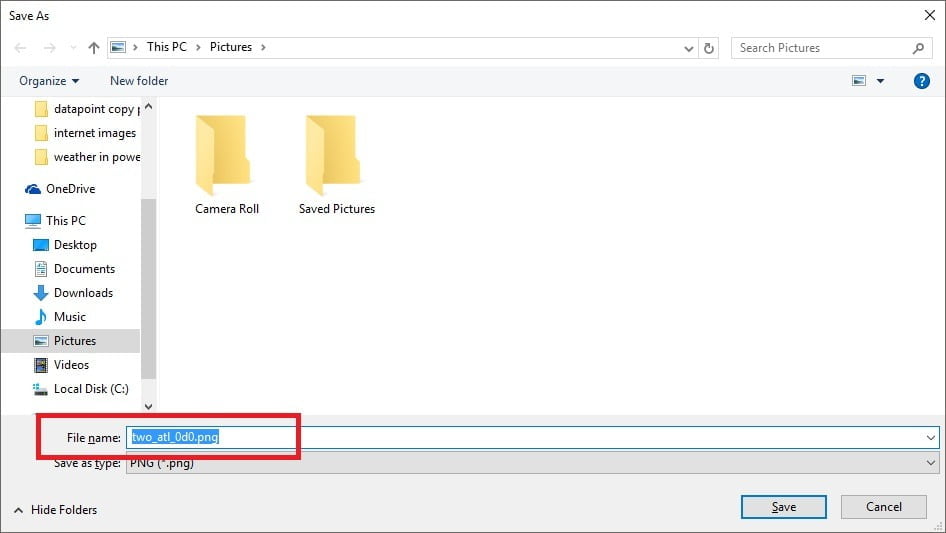
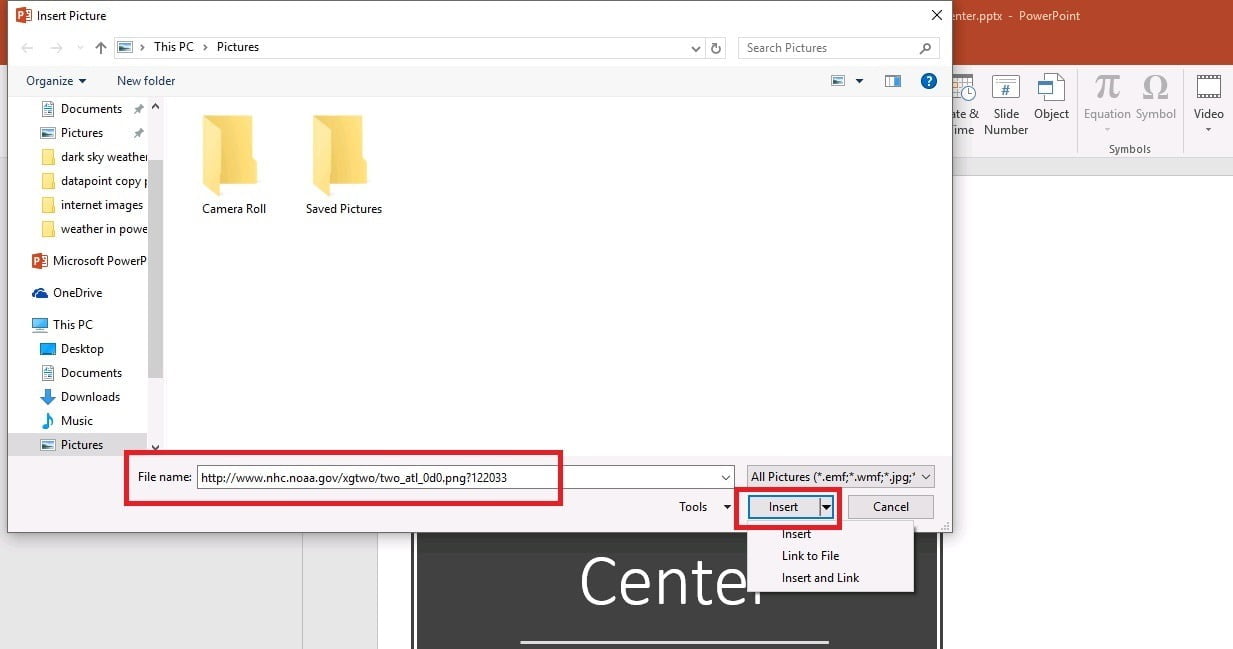
Go back to the browser and right-click again on the image that we need. Now choose the Save picture as option, as if we are going to save the image to our hard disk.
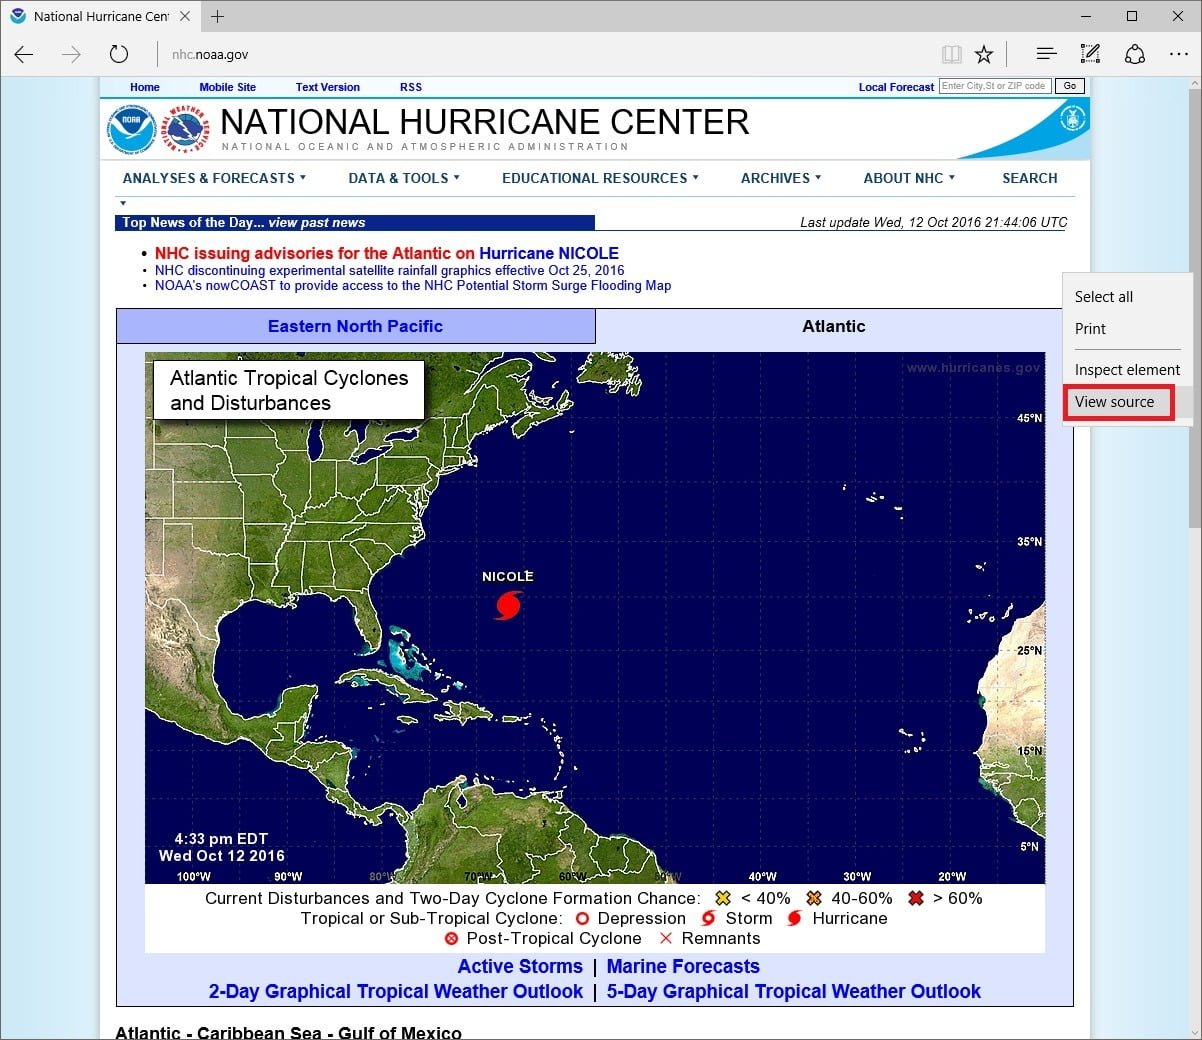
Press CTRL+F or look for a Find option at the source document and paste the name of the file name (we copied it earlier). Find the first occurrence of that file name in the HTML source. As you can see on this screenshot, the filename two_atl_0d0.png is located in the folder named xgtwo of the web site domain. Select and copy the value that you see there at the variable src between the 2 single quotes, without the quotes like this:
/xgtwo/two_atl_0d0.png?122033
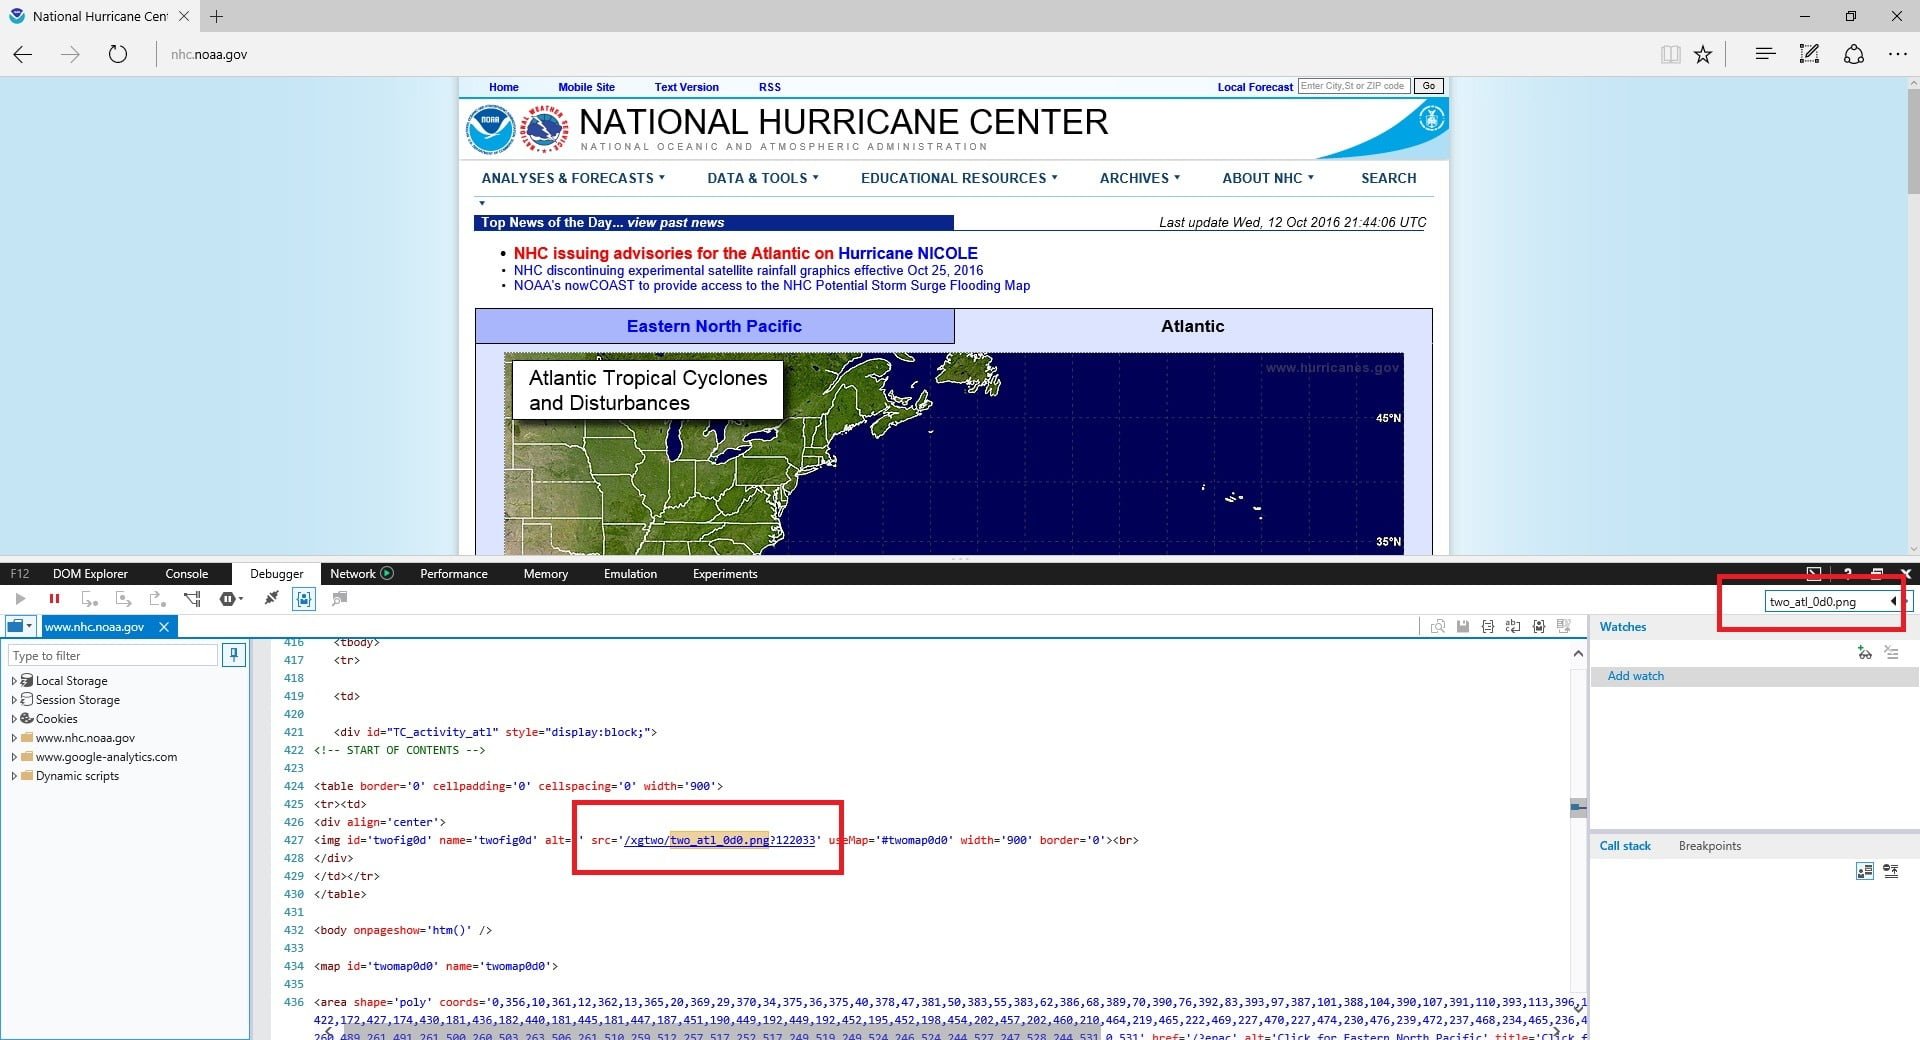
When we combine the domain name, with the folder(s) and filename, then our direct url would be like: http://nhc.noaa.gov/xgtwo/two_atl_0d0.png?122033
Use your internet browser again and try out the full URL. Make sure that that image is showing up. You should see the image only on your browser, without all the rest, without all the HTML texts.

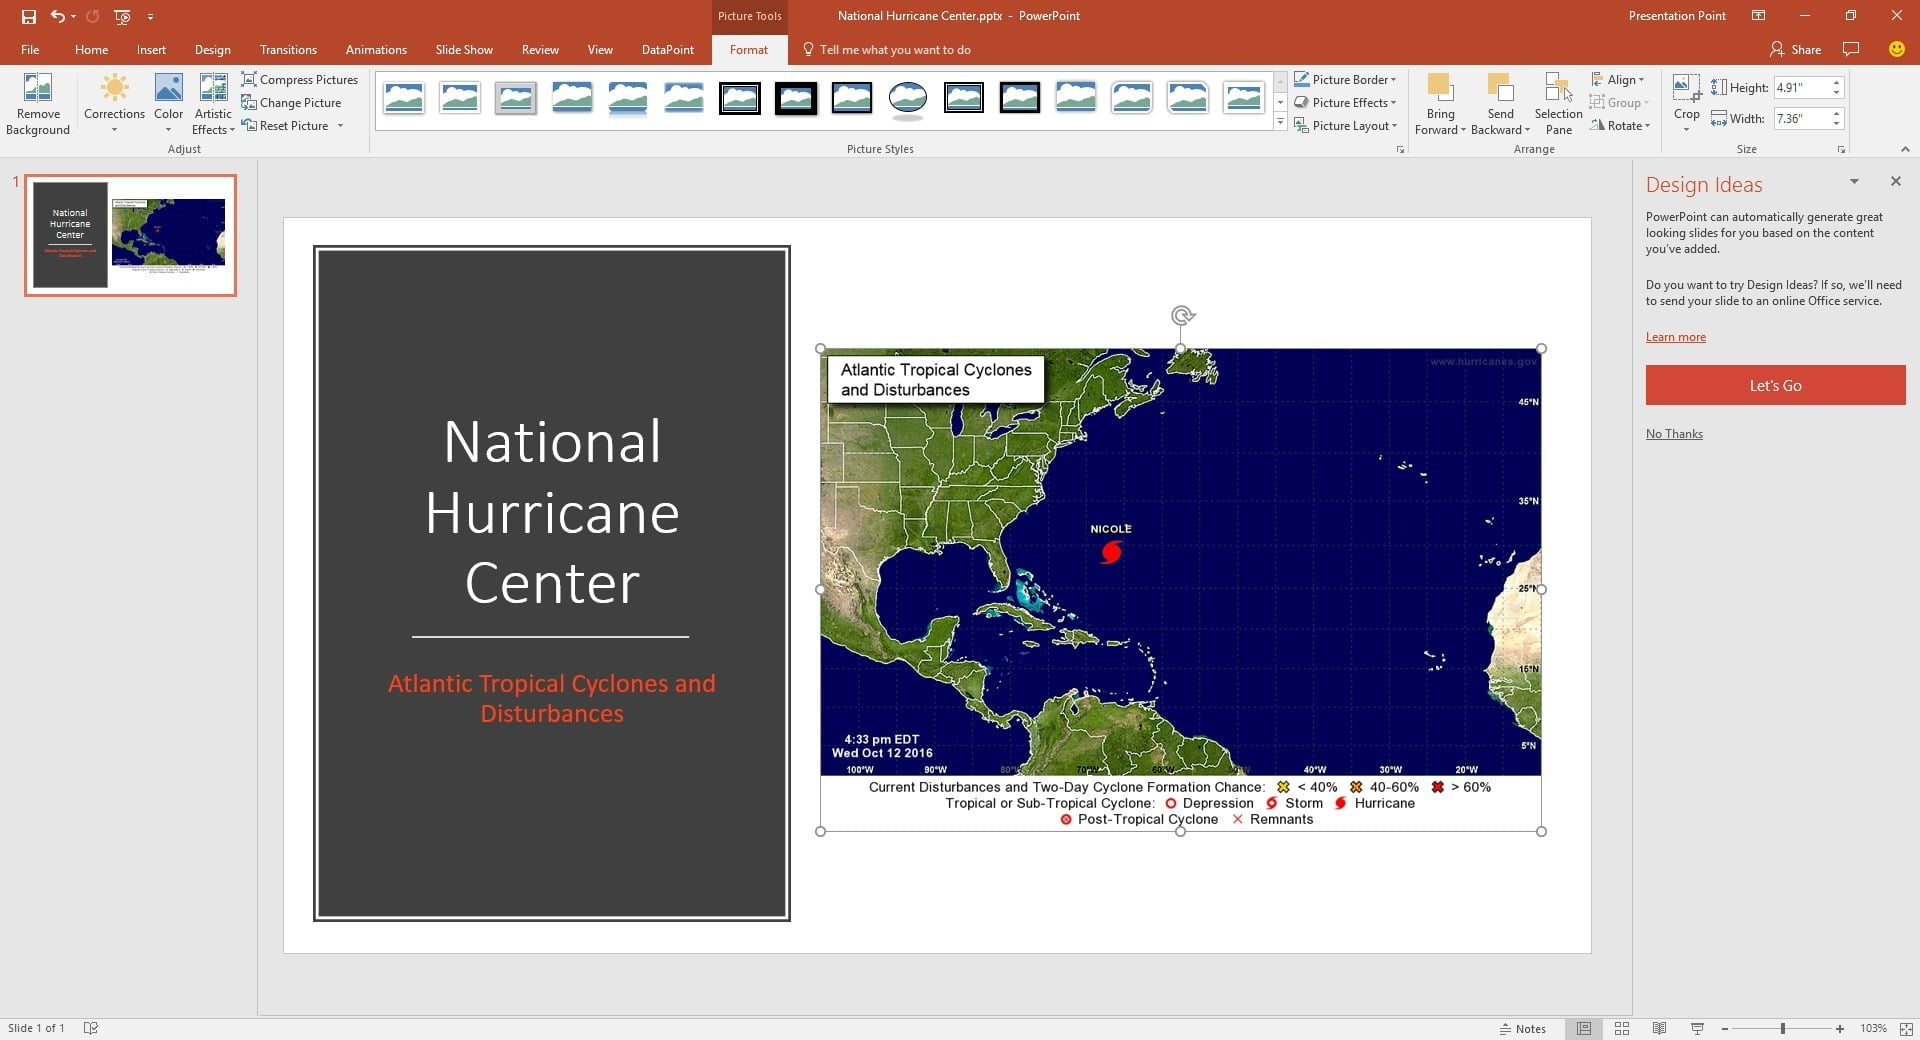
The internet image is now placed on our slide as before, but now it is linked to the web site.
The ultimate solution with continuous real-time images
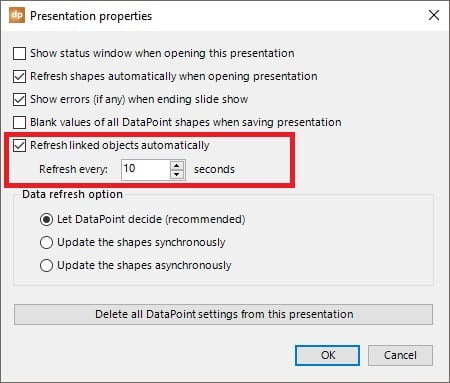
When we would run this presentation as a continuous slide show, then we will be showing old information too. We need a mechanism to update this image during the slide show. This is what our DataPoint tool can do for your information screen, next to many other things it can perform.

Make sure that the option Refresh linked objects automatically is enabled and check the refresh rate. With these settings here, DataPoint will update the linked images every 10 seconds for new updates and update the images on your slides.


Hi, I’m am using an evaluation copy of Data Point on Power Point 2016, and I cannot seem to get my images to dynamically refresh following the guide at https://presentationpoint.com/blog/link-internet-image-powerpoint/
The only way I have been able to get it to refresh is by setting up a connection through Data Point, that spits out a link to an image on the web, that is different from the previous link that the power point slide is using. Then, the image refreshes once the link presented, to the image changes.
Hi Tony, I created a trouble ticket for your problem. Will answer there.