
PowerPoint is such a great and easy tool to create your digital signage videos. You will find professional and great designed ready-made templates, as well as you can create your own digital signage presentations.
Use a slide per message, or a slide per product or service that you want to promote. Use a clear title, short description and use a price on a striking image. To emphasize your message, you can animate the shapes on your slide. First show the background picture, then fly in the title and description, flip the price and add a grow and shrink animation on the price.
This can easily be set up in PowerPoint. No specialized and expensive software needed. Click to open the Animation tab, click the Animation Pane, and preview your animations.

In between slides, you use transitions to take away the previous slide and bring on the next slide. To set and verify your transition setting, click the Transitions option of the PowerPoint ribbon. Choose your transition and make sure to uncheck the option On Mouse Click, and more important: make sure that the After option is checked and a time is set. Check all slides individually, or when you have slides that are equally important, and then just click the Apply To All button.
With digital signage (depending on what software you use) you can typically choose to run the PowerPoint presentation as a slideshow, or to export the slideshow to a MP4 video file.
When using a PowerPoint slideshow, and then make sure that the full PowerPoint product or the free PowerPoint Viewer is installed on the player machine. In case of an exported MP4 video file, then you are less dependent of PowerPoint. Any video file player (typically included with your operating system and cross-platform) will do.
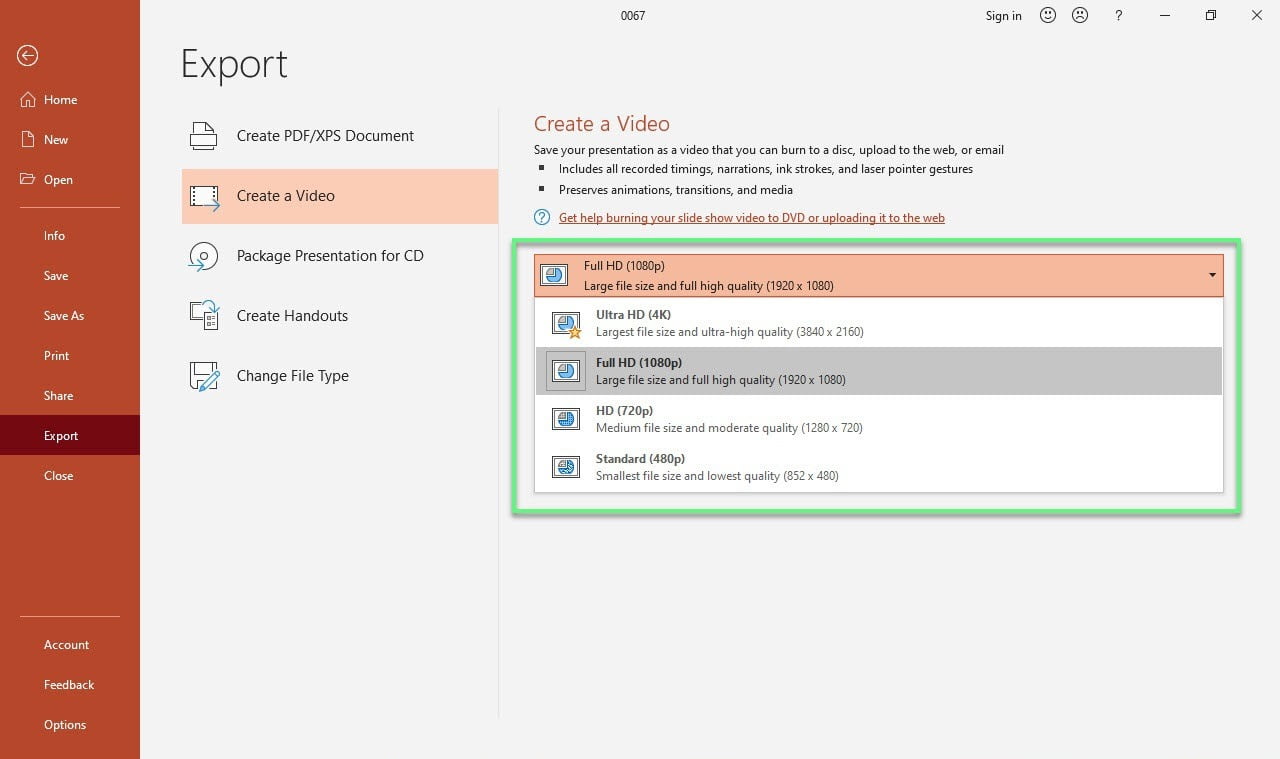
To create a video out of your PowerPoint presentation, click the File, Export from the menu. Then click the Create a Video option. This option is made available in PowerPoint version 2016, 2019 and Office 365. Older versions do not have this option.
Default video export quality is set to Full HD (1080p), which will render a high-quality video of 1920 by 1080 pixels. The more pixels in your resolution, the higher your video quality is, the larger the file size is. You can choose to use a lower quality (make sure when to choose this) or an Ultra HD video file with 3840 by 2160 pixels.
Then click the Create Video button.
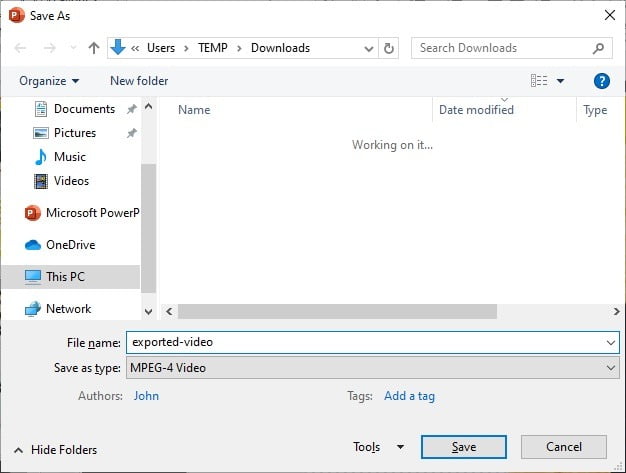
Browse to the folder where you want to save and store the rendered video. Give it a name and click the Save button.
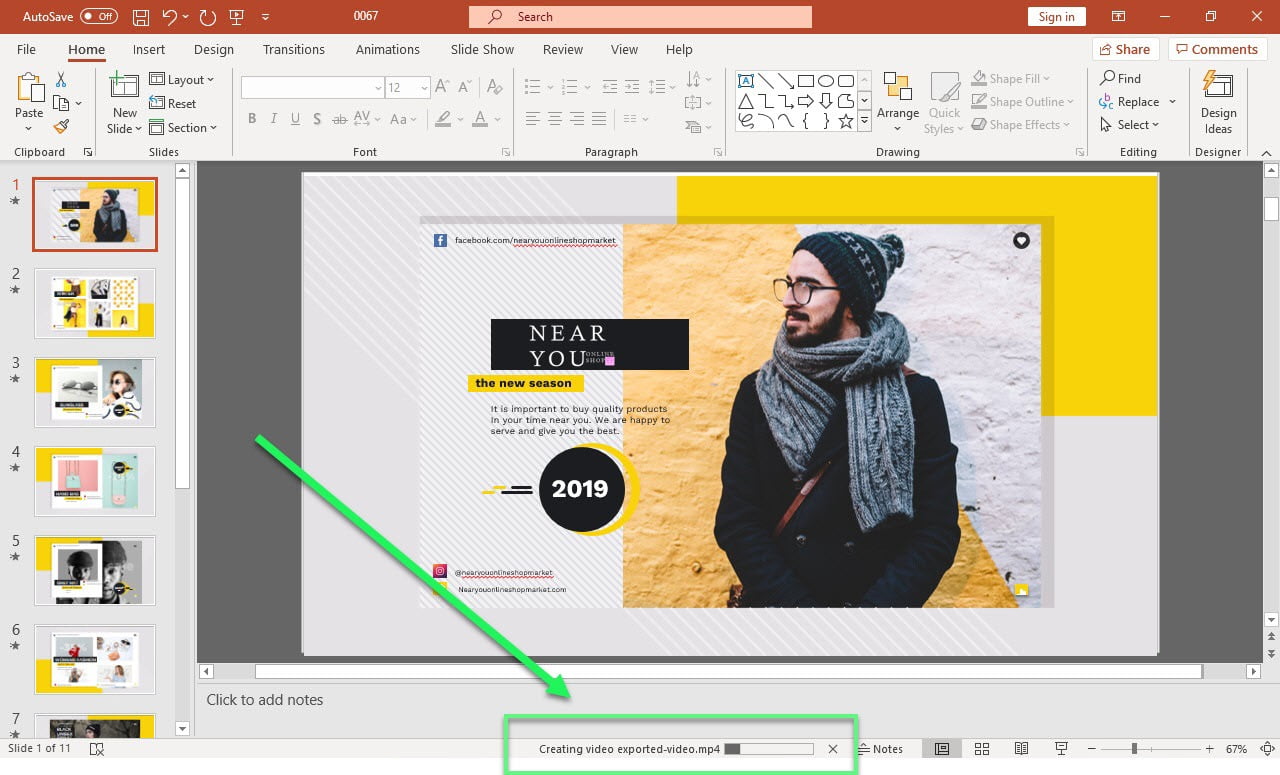
PowerPoint will now generate a MP4 video file. You will see its progress at the bottom of the PowerPoint application. It will show there a progress meter with the text Creating video [filename]. While that PowerPoint is generating the video file, you can continue to work in PowerPoint on this or another presentation. Just leave PowerPoint open.
Note that the time needed to render the video, depends completely on the number of slides you have, the animations and transitions chosen, and most important; how long your slides are shown. If you set a given slide to show for 5 minutes, then PowerPoint has to generate an identical video file where that slide is also present for 5 minutes. Roughly said, the total slideshow runtime or duration, is almost identical to the video rendering time needed.
When done, you can place this video file on a USB memory stick for your Adidas digital signage network (=manual distribution, by foot:-)), or use professional software like iPoint or SignageTube.


How do you attach an audio file to go along with the video?
When you have audio on your video, or a separate audio files on a slide, then I guess that it is copied over and included on your video file. Is it not working?
@Barbara Bush :- Just insert the audio file at the first slide. Then go to “Playback” tab. Then select “play across the slides”. And that’s it. 🙂