
You see those tablet devices hanging next to the door of a meeting rooms in offices. This discretely display meeting information and you can see who is having a meeting and when your meeting is starting.
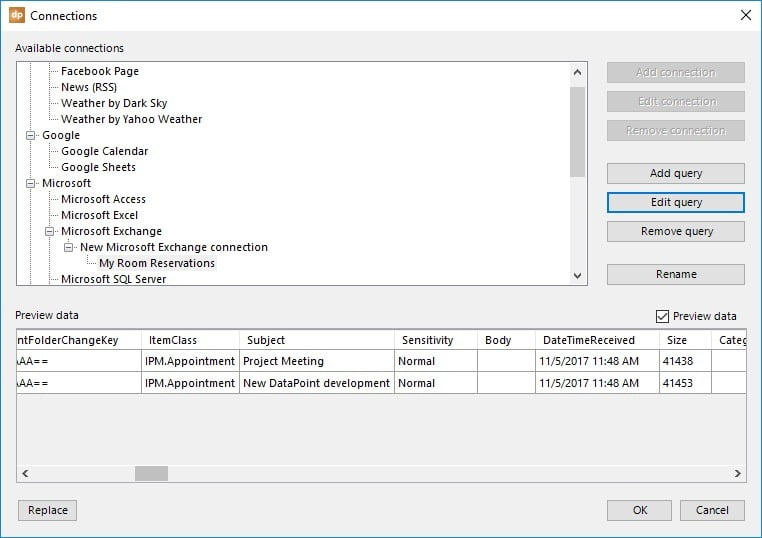
These presentations can perfectly be created with a PowerPoint information and it can get the content in real-time from a calendar service like e.g. the calendar that you are already using in Microsoft Exchange.
All you need is a tablet or computer screen, Microsoft PowerPoint and our DataPoint add-on. Read how you can create your own full-controlled meeting room display software with real-time updates from your calendar.
Design in PowerPoint, Data in Exchange
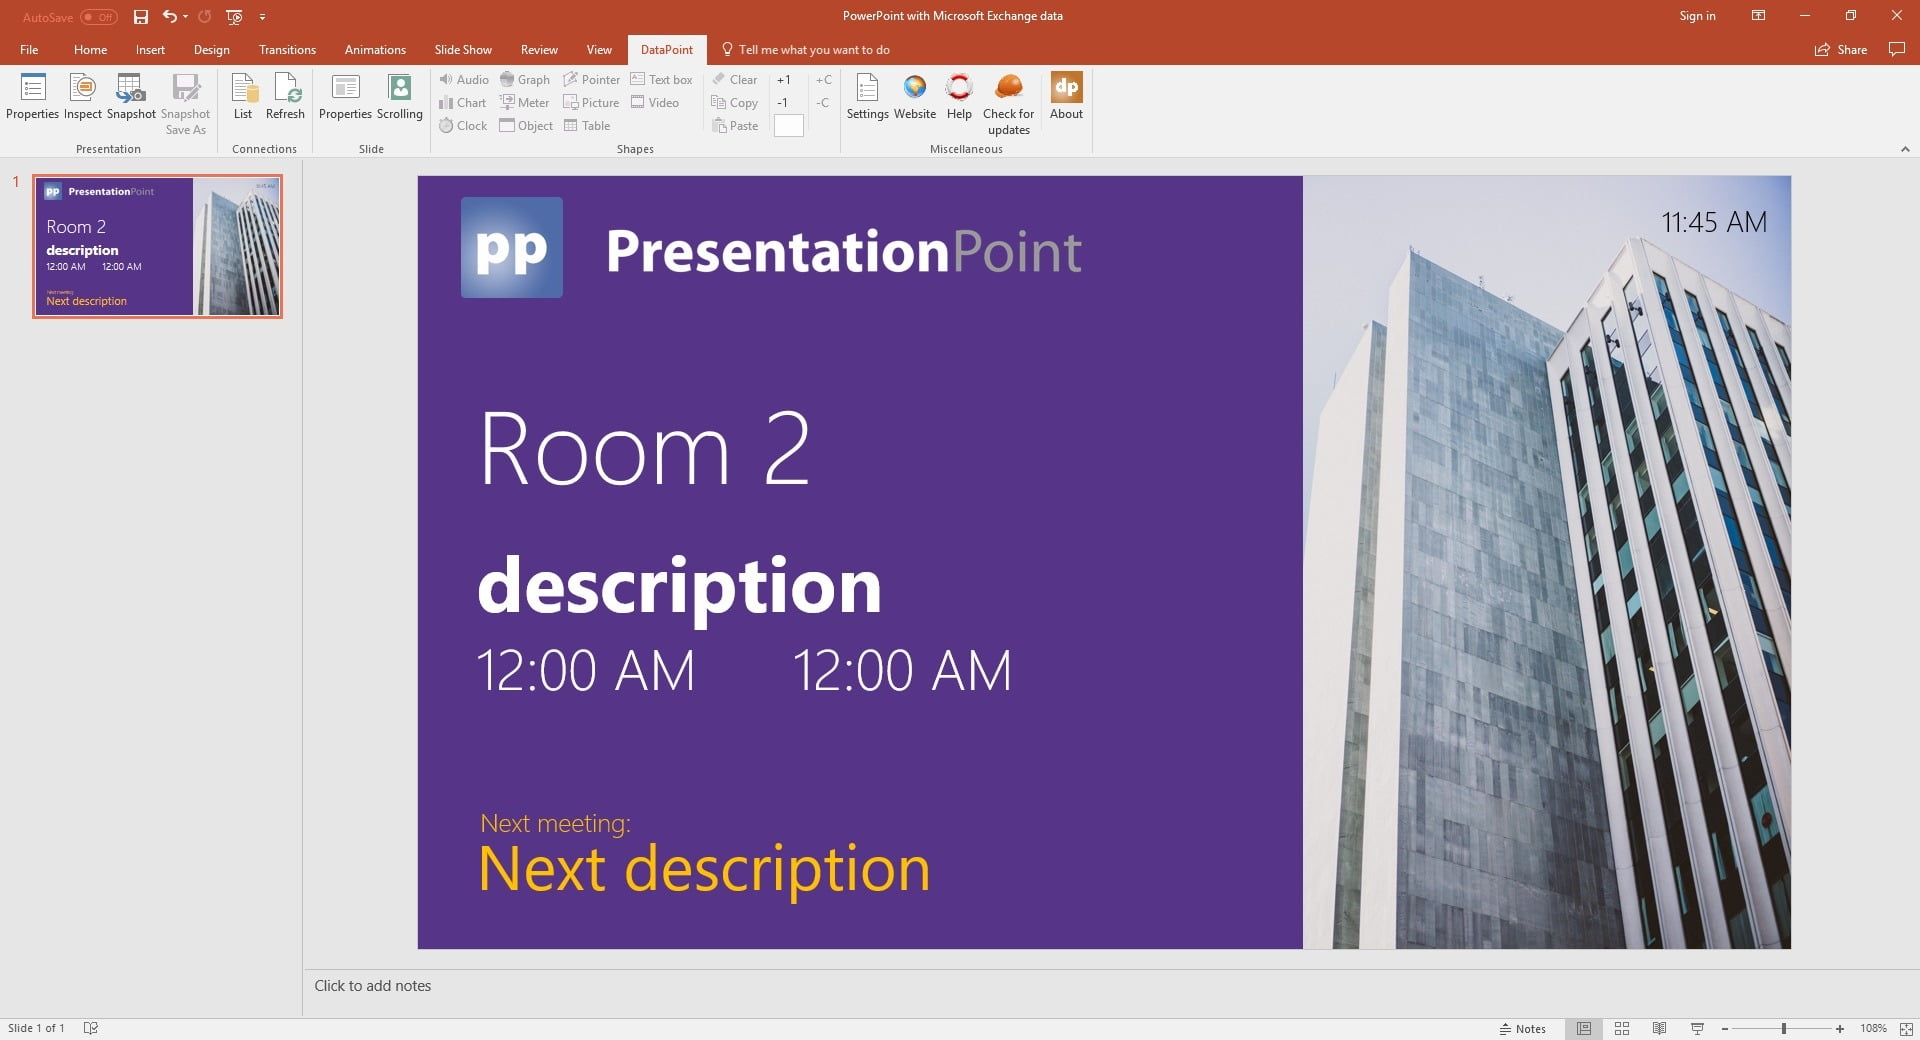
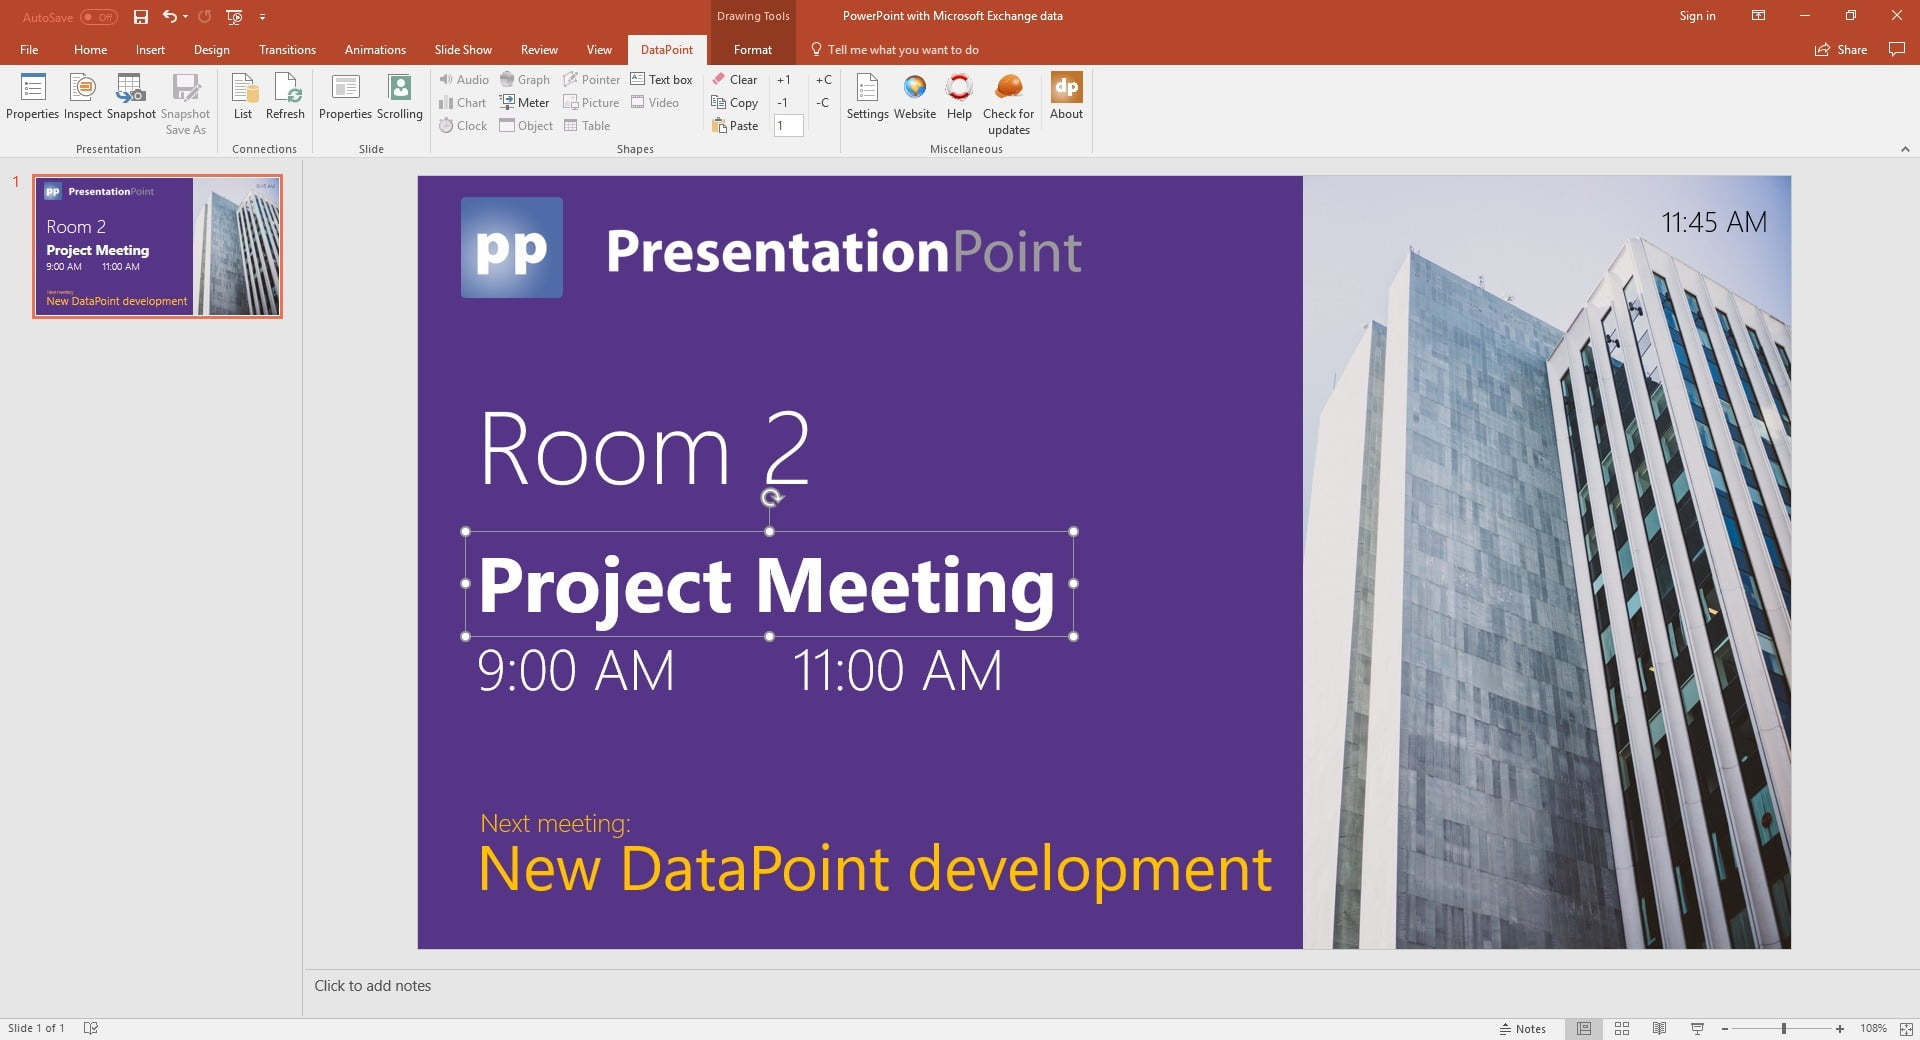
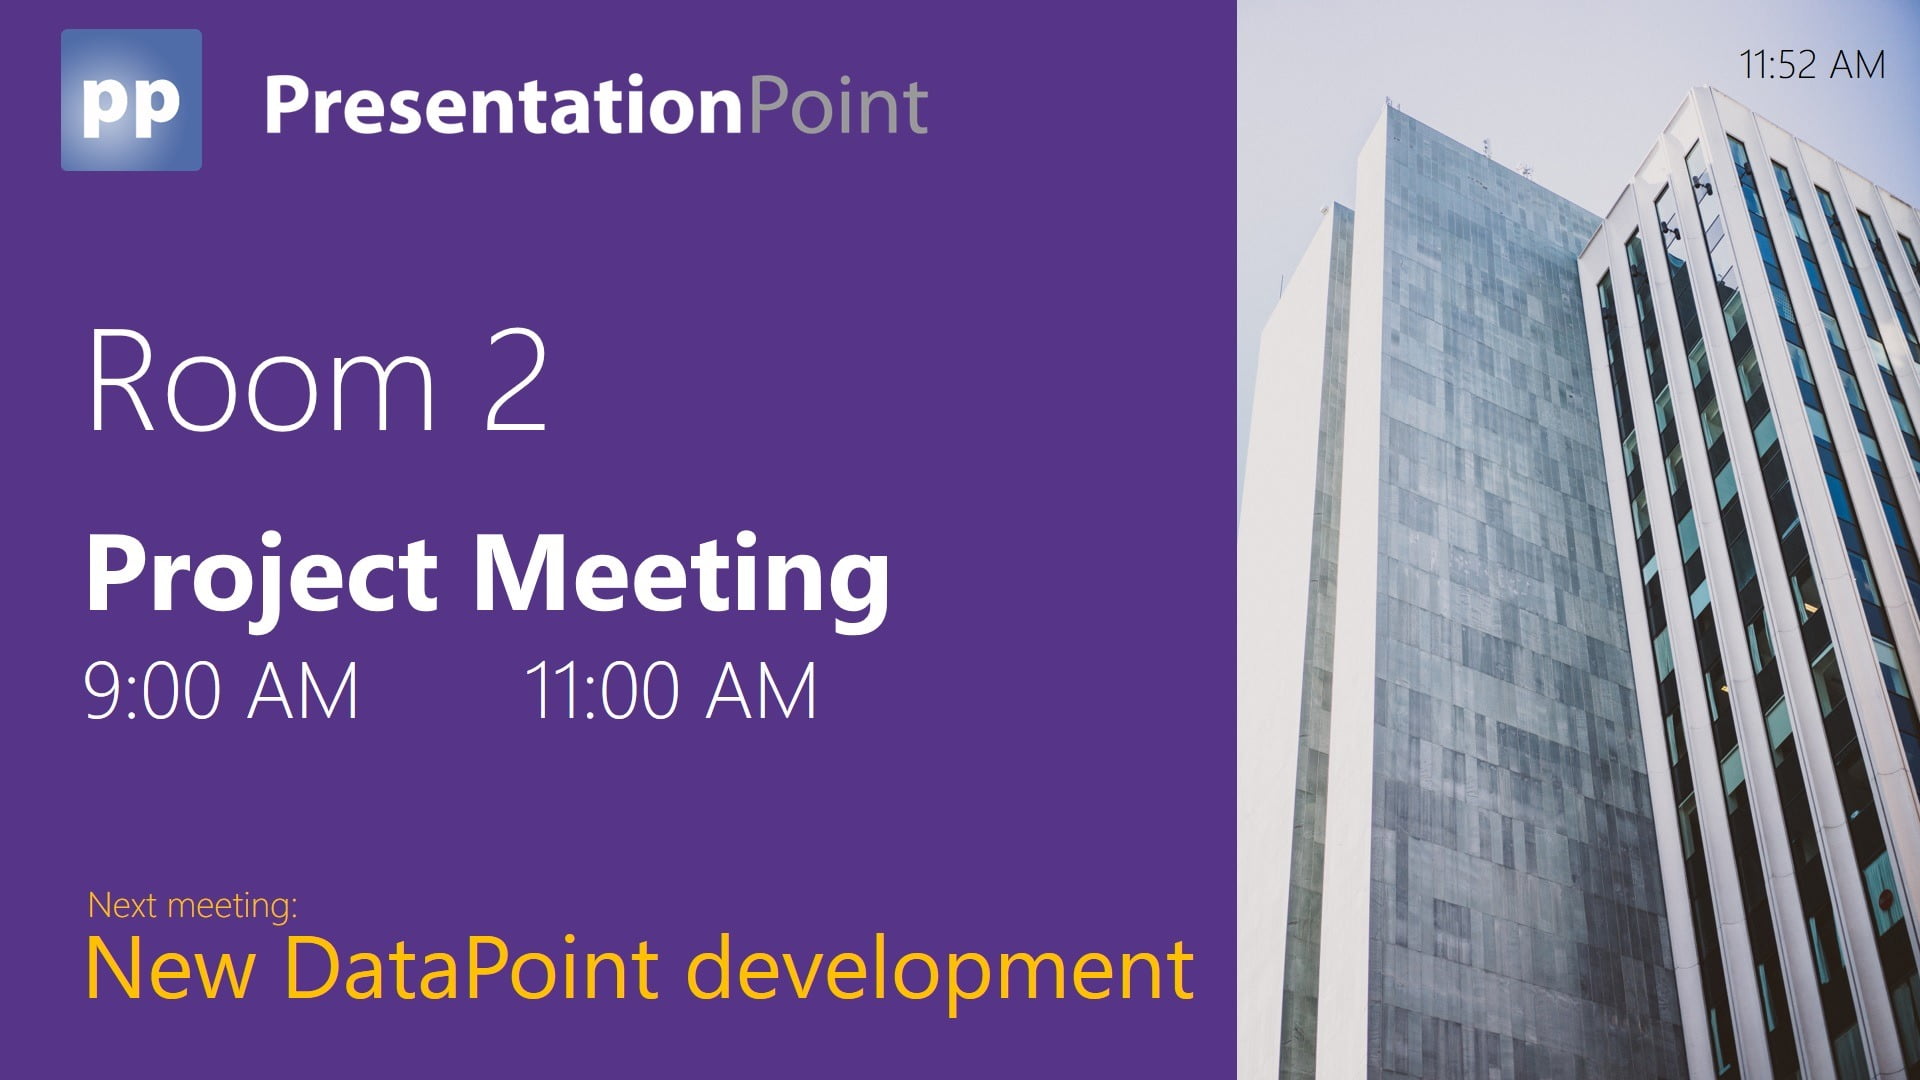
We start with this prototype meeting room presentation that we want to use to show the information. Your company logo, of course the current time, the current meeting and next meeting information. Then is very easy to create since you just have to place some pictures and text boxes on your PowerPoint slide.

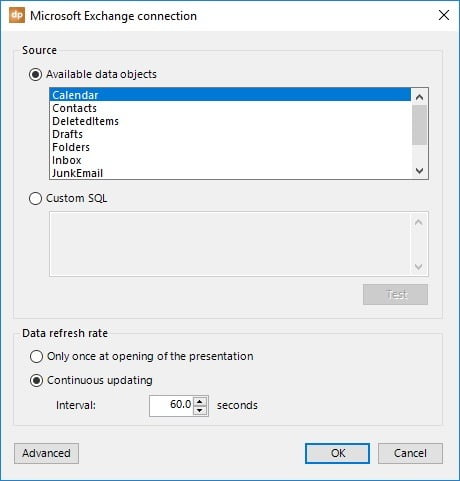
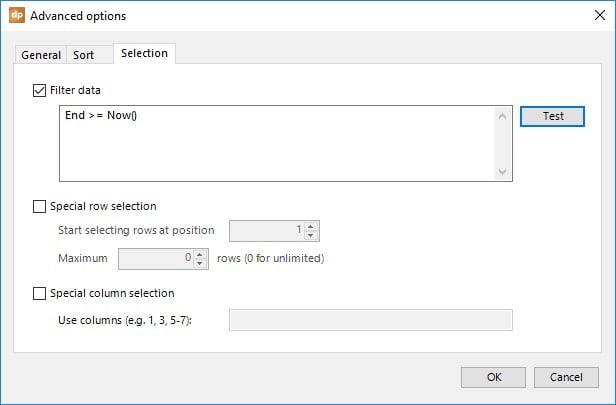
Also verify and set your data refresh rate for real-time updates during your slide show. For a meeting room booking system, it makes perfectly sense to requery or poll the data every minute.

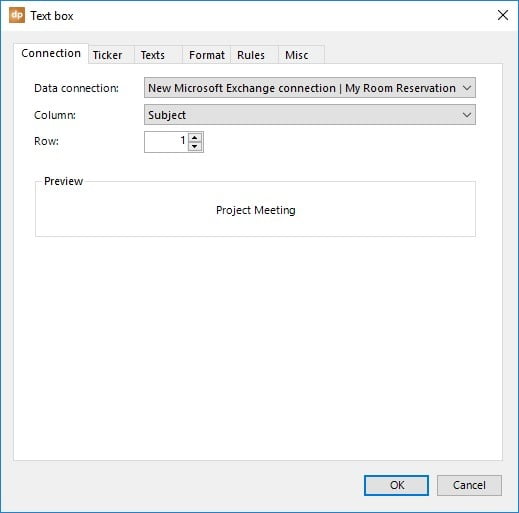
Do some similar linking on other text boxes for the start and end time, as well as the name of the next meeting.
Meeting Room Booking System Using PowerPoint and Exchange
This is a perfect demonstration of what you can do with Microsoft PowerPoint and our DataPoint add-on. It gives you full flexibility to design your own meeting room booking system display screens, with the presentation software tool that you already have and know how to operate.
What else would you need?

With Office365, there is no password field associated with a Room Resource. Where is that coming from in your example?
Hi Chuck
The account that we were using here is a personal account (as if physical person) and there we read out the calendar info and then we see the rooms. You see.
Most of the companies have usually a “room calendar” per room. Can we use one account that has access to all room calendars for example instead of a personal account for each room?
Sebastien, sure. You can read out all information that you can access and then filter out the information of a given room.
You can set up multiple queries in DataPoint and use a different where clause to filter out your room info. See it?
Can DataPoint be used to make a page for the tablet device (mounted next to the meeting room door) so that a user could select an open time slot and book a meeting on the spot *and* this new meeting would be added to the Office365 resource calendar for the meeting room?
Hi Alvin, DataPoint can only display data in real-time. So not DataPoint but we have done this before with some action buttons on the screen where you execute a custom script which will insert that data.
This could be custom work if you want.
For a continuous update of the room information, is the Standard version of DataPoint sufficient or do we need the Enterprise Version?
Dear Stefan. For continuous updates on your slideshow, where the info is coming from Exchange: this can be done with the DataPoint Standard edition!
Hi Admin
if create more than 10 room can run in real time?
i want create summary meeting room on TV, more than 10 room?
can or not?
Sure Ady, you can always activate the data scrolling: https://presentationpoint.com/blog/data-scrolling-or-using-virtual-slides-in-powerpoint/
So when you have more rows than space, it will transform your slide into ‘virtual slides’ with all data rows!
Hi, looking to create a summary of meetings/events of various rooms in an area and have it displayed on a single screen in the lobby, is this possible. cheers
Definitely possible with our datapoint plugin: https://presentationpoint.com/solutions/event-digital-calendars/
The product has a lot of potential but a lot of manual setup is required, do you have documentation for the options, as there isn’t much help available?
You can find our documentation here:
https://presentationpoint.com/docs/
And if you have any questions or problems, you can send us a support ticket here:
https://presentationpoint.com/support/
Thanks for the informative blog