
PowerPoint is great for designing leaflets, posters and other forms of advertising. It is a great, powerful but easy tool to generate your documents and graphics. High-end software like Adobe Photoshop or Adobe Illustrator is not needed. In this article, we will learn how to convert PowerPoint to JPEG.
Before you start creating high resolution or high definition presentations, there is an important option that you must set in PowerPoint, before you start importing and using your first image. We have spent a whole article on that. As a recap, in PowerPoint, go to File, Options, Advanced. And check the option Do not compress images in the file at the Image Size and Quality group. With this option set, your high resolution images, will remain high resolution, when they are stored within your presentation. When you forget this option, your high resolution images will loose its quality and high definition for sure on the first save.
For some occasions, you want to create a presentation in PowerPoint, and then export the presentation as individual images, an image per slide, for example to be used as images on a SD card on your television, as a cheap method to run the advertising in your shop.
Let’s see what will happen. Insert a high resolution image on your slide, or even set this image as your slide background.
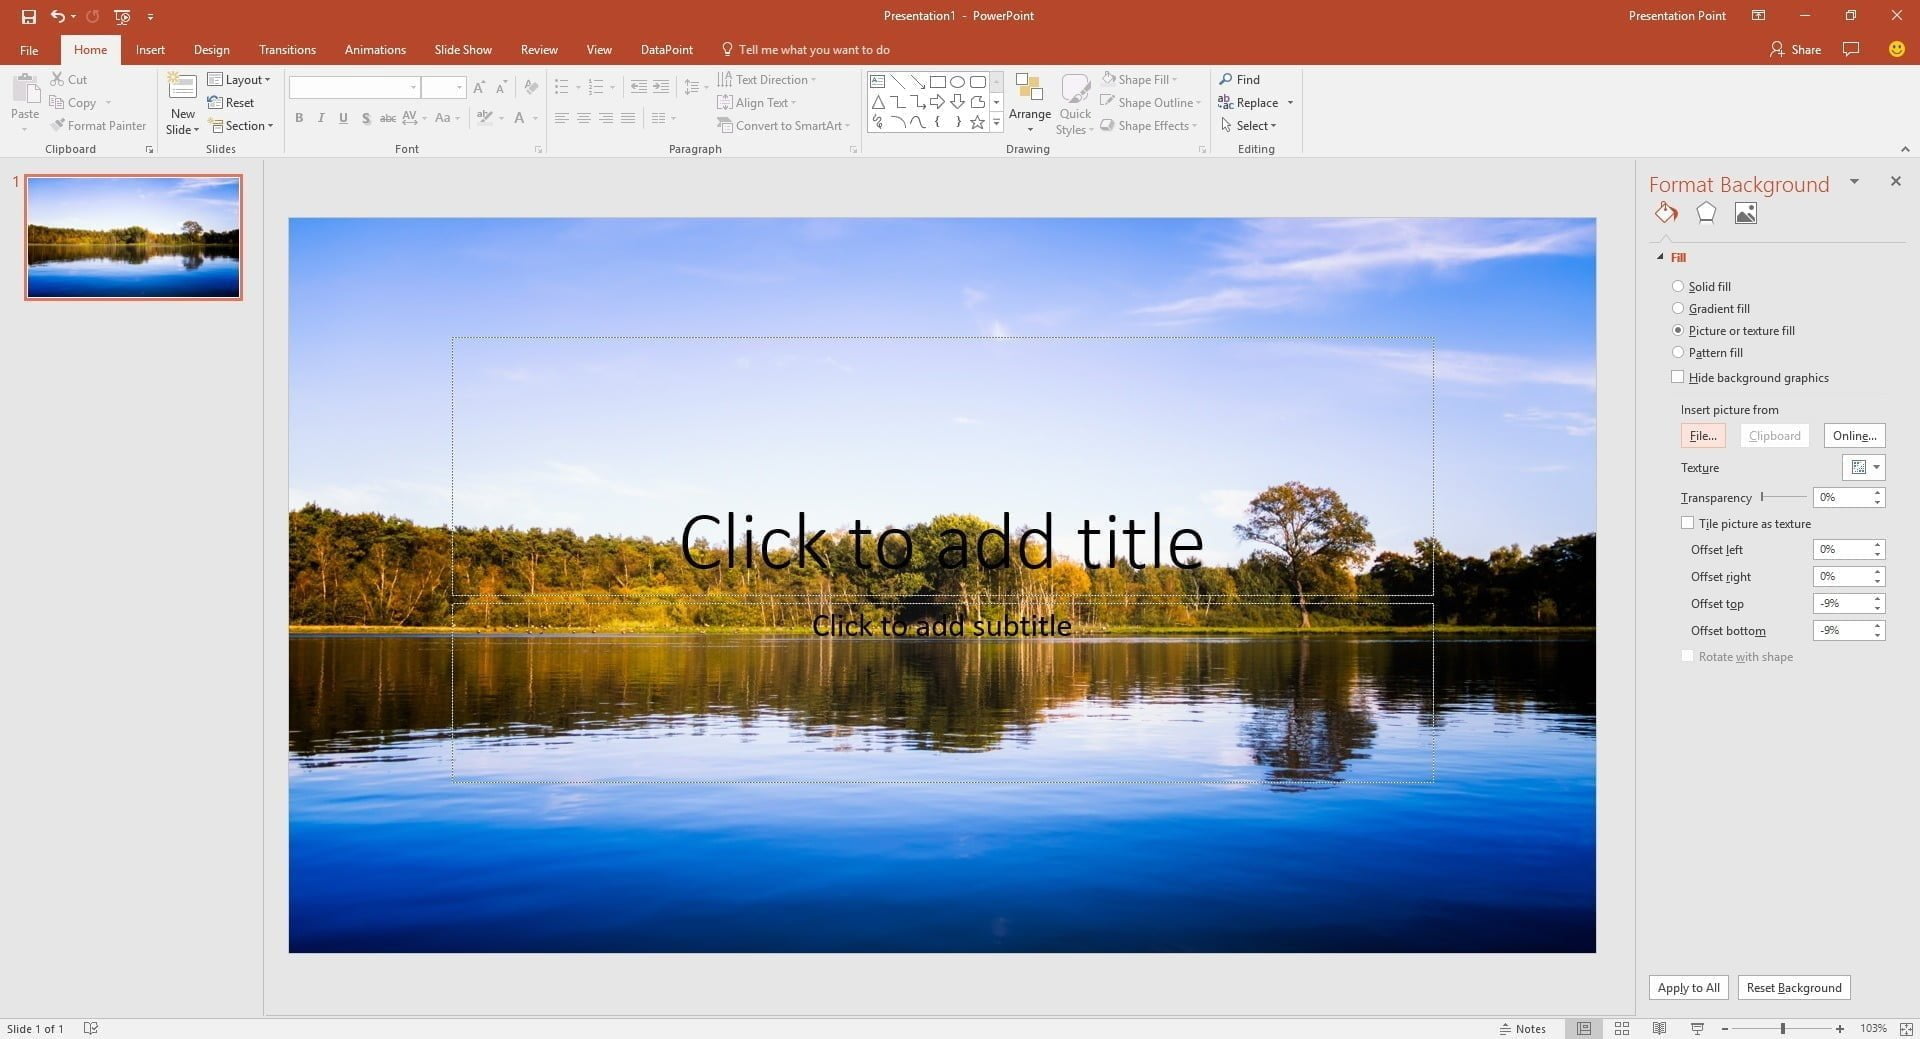
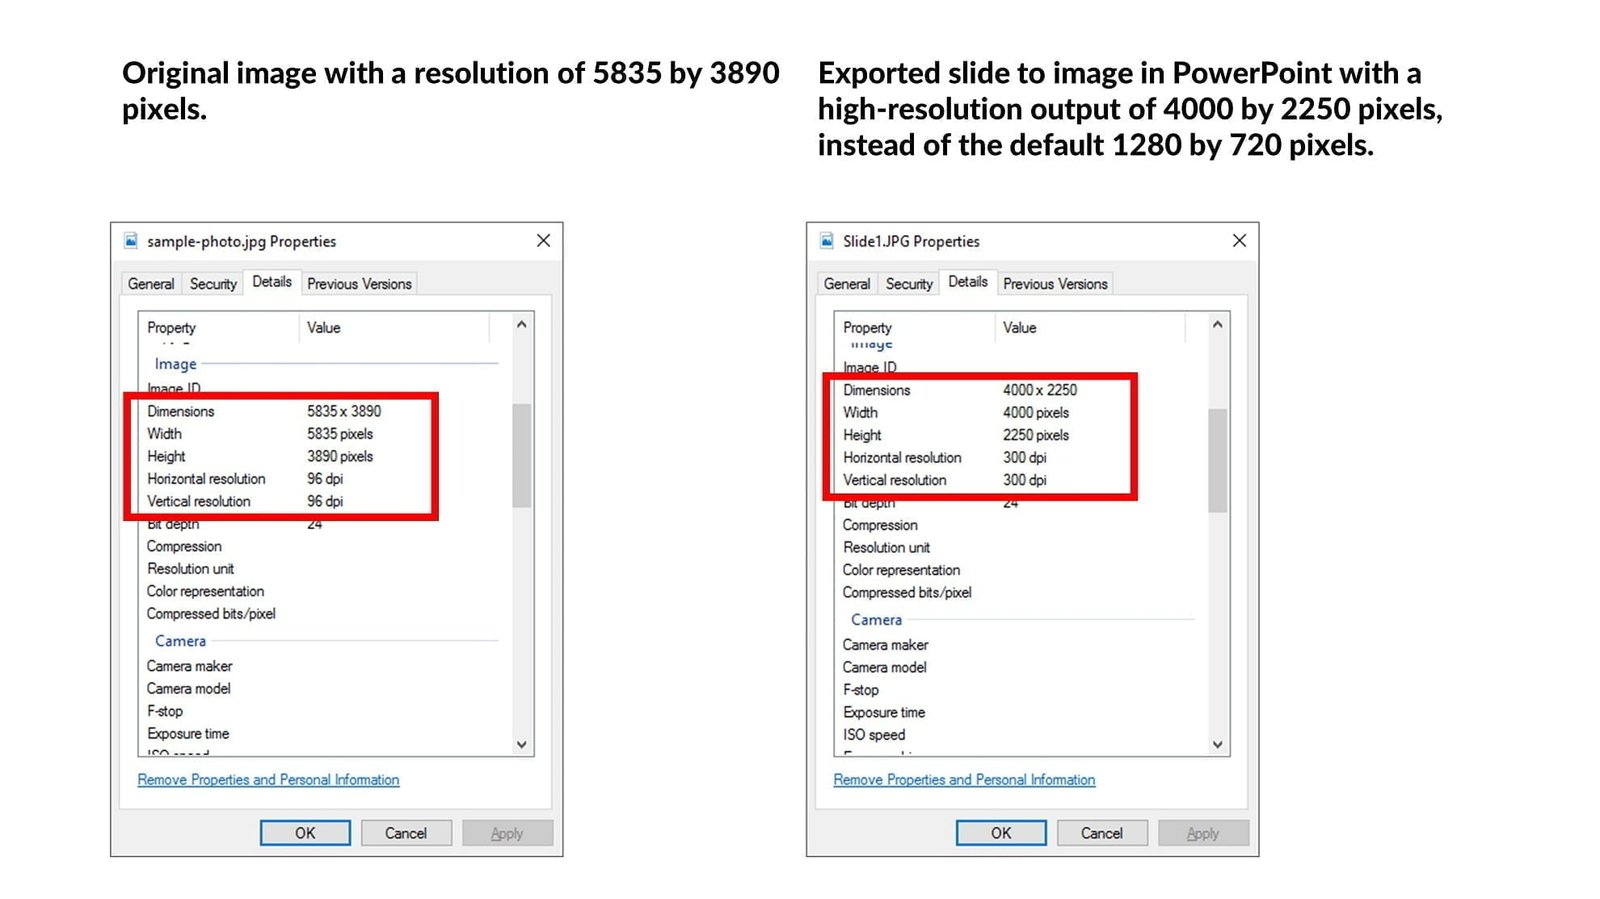
The size of the original image was 4.08 MB, with a dimension of 5835 by 3890 pixels. When we save the presentation, it’s file size is 4.11 MB. So, we can conclude that no image information was removed, nor compressed by the PowerPoint save action.
Now click File, Save as. As file type, select JPG or even the uncompressed version of an image, BMP. Hit the Save button. Explore the generated image in your File Explorer.
You will see that your image probably has a dimension of 1280 by 720 pixels, while the original size was 5835 by 3890 pixels. How is that possible? The original size of the image in the presentation is kept when we save the presentation, while when we export a slide to an image, it drops to less than 25% of the original quality.
So, while the convert Powerpoint to JPEG worked, the image is not as high quality as we want.
Default export resolution
Well, that is the default resolution of PowerPoint when you export to images. So with a default of 1280 by 720 pixels, which corresponds to 96 dpi (dots or pixels per inch) , you have a lower image resolution than HD or high-definition quality of 1920 by 1080 pixels. That is a resolution that we don’t want to use for high-quality images for our advertising purposes. So we have to change that!
Change export resolution
There is a method to change the resolution of the images that you export in PowerPoint. The standard for high-quality images in the professional printing industry is set to 300 dpi. So we want our PowerPoint to JPEG conversion to be set to these printing standards.
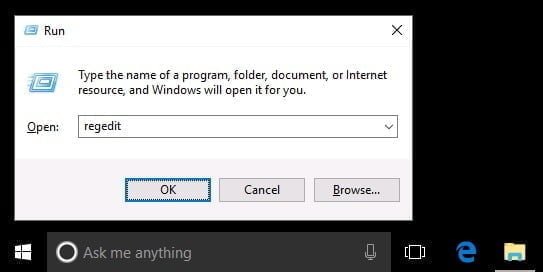
To change the export resolution, use the registry editor. Click the Windows button and R on your keyboard, and type in regedit at the open option. Hit OK to execute the open command.
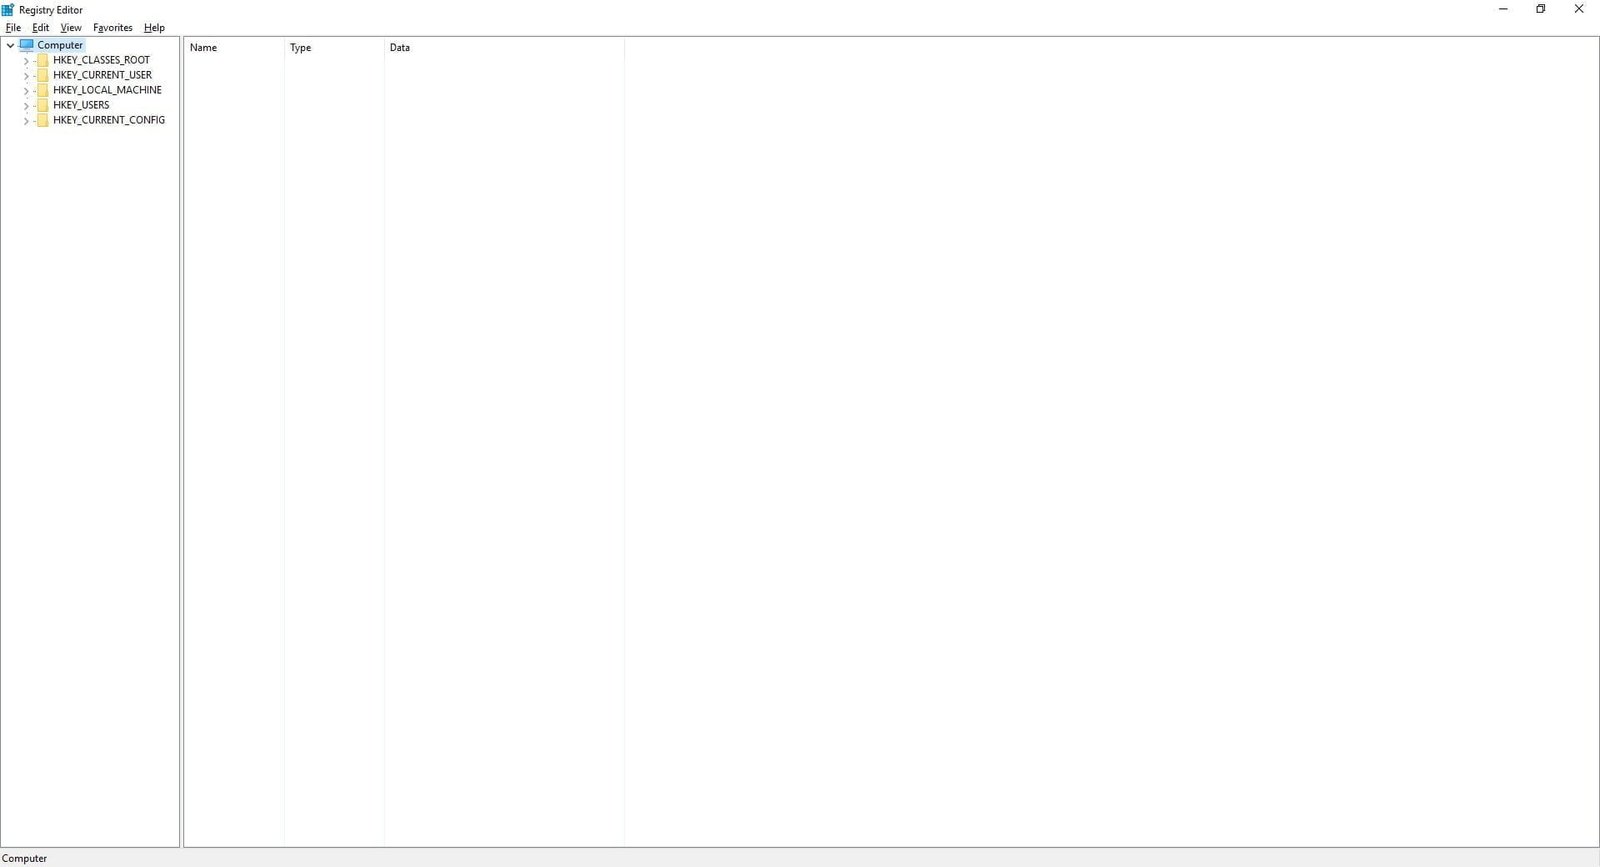
Use the tree view at the left and open the folders HKEY_CURRENT_USER, Software, Microsoft, Office.
Depending on the version of Office that you have installed (and are using), you have to open 14.0 for Microsoft Office version 2010, 15.0 for Microsoft Office version 2013 or 16.0 for Microsoft Office version 2016. Those are the internal version numbers as Microsoft have set them.
We are using Microsoft Office 2016, so we open the 16.0 node or folder.
After that, continue down to PowerPoint and then finally Options.
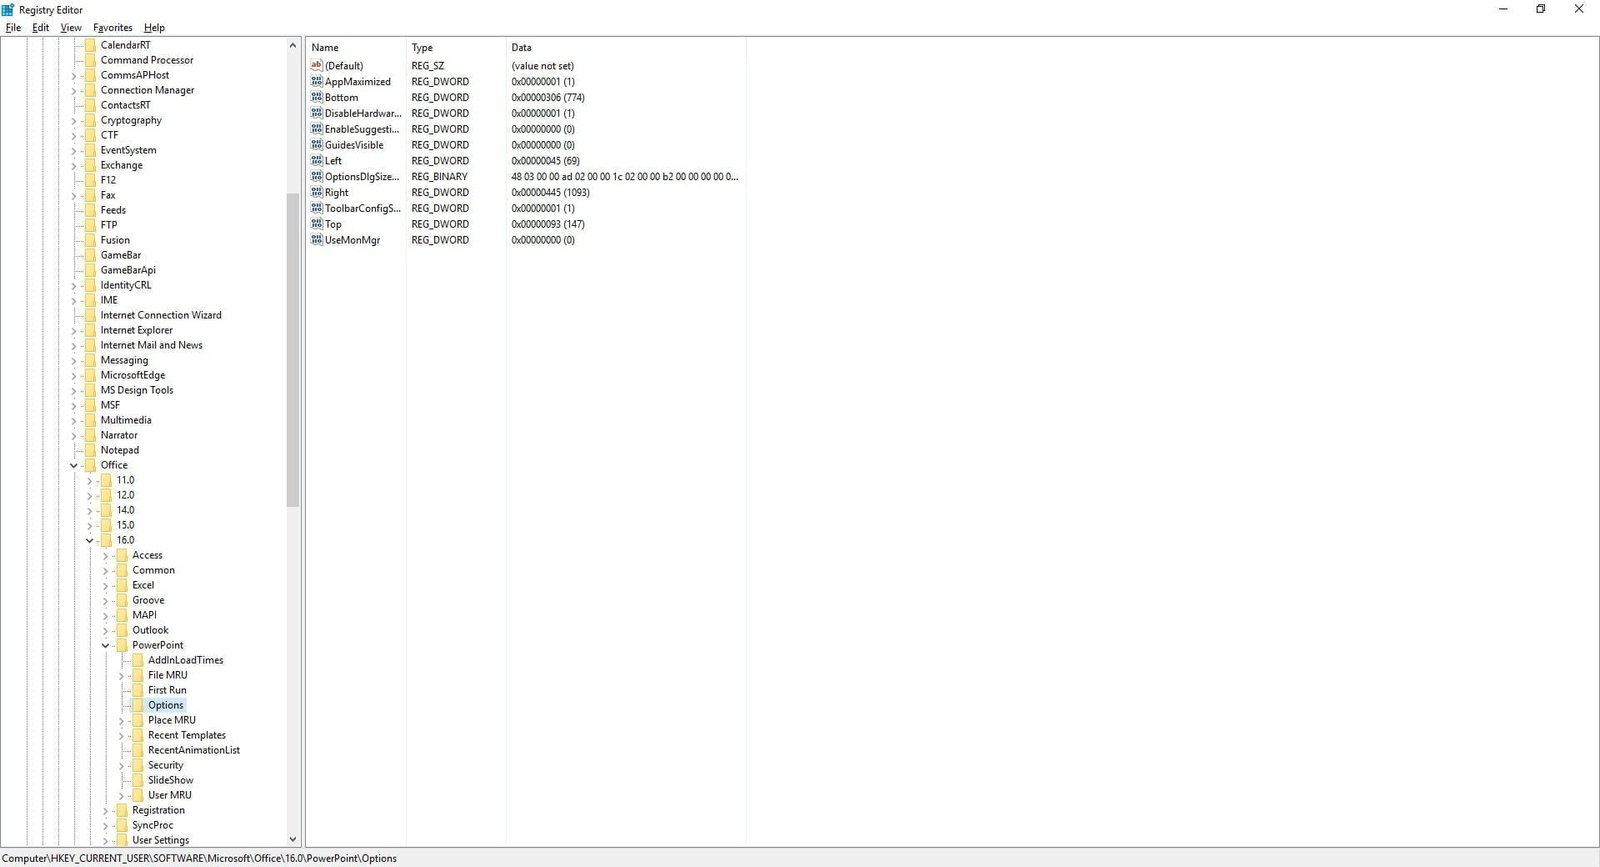
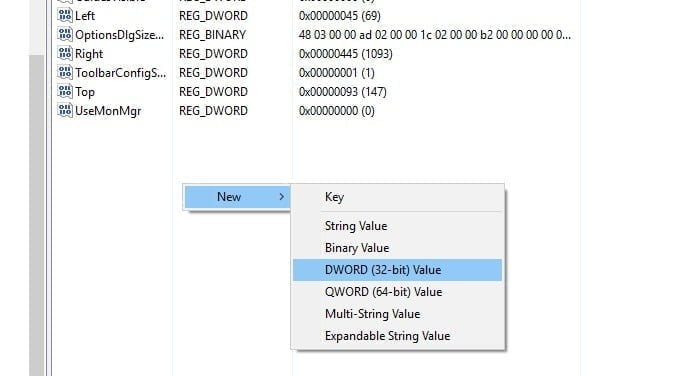
Name this new entry ExportBitmapResolution and hit ENTER. Double-click this new entry and set the Base to Decimal and set the Value data to 300. Click OK to confirm. At this time already, this entry is physically added to the registry. There is no option to save this ‘document’ as you might expect with other type of documents.
When this setting is not present in the registry (this is the default situation), then a value of 96 is assumed and this results in an image export in a 1280 x 720 pixel resolution. This higher the value you use here, the higher your pixel resolution will be. As written before, 300 is a value that is commonly used for professional prints and advertisements.
Restart PowerPoint and open your last presentation again with that high-resolution photo inserted. Once more, click File, Save as and choose to export to the image format like e.g. JPG. Verify the image resolution of the generated file again and you will see that the export image now has a resolution of 4000 by 2250 pixels. This is a high-resolution exported image from your PowerPoint design and it much better looking that the original or default PowerPoint settings.


Thank you. This topic as very useful for me.
You gave a very clear explanation. 10/10!!
Graag gedaan Karel. Leuk om te horen!
if i use a3 paper then i export to jpg i have set it to 300dpi but why turns out it only has 219 dpi ? its only work for a4 paper ?
Hi Jeehan,
I just tested it here with Windows PowerPoint 2016. Slide design of A3 and then A4. Both exported to JPG. When I check the files, they both have a perfect 300 dpi according to the properties.
How are you checking?
Thankz Very Much
I tried this last night. Perfect! Excellent instructions. Thank you!
It does work. Thank You very much!!!!
Thankyou so much ! It works !
very useful! thanks!
Maybe you can help with this mystery! My registry is edited to export at 300 – when I save a deck as .jpgs, the images save at high resolution and look great. However, when I use Powerpoints Save As, Picture Presentation, the images on the decks save at low resolution and look terrible. any ideas on what to do?
Hi Eileen,
Frustrating when your high-quality images get destroyed when saving. Most people would not care, but professionals do.
This might help: https://presentationpoint.com/blog/powerpoint-compress-images/
I guess that your images are compressed automatically to 96ppi when saving. Let me know.
Thanks a bunch!!!!
Great tip – I use PowerPoint 2007 – and this worked just fine for me. One suggestion, for those users who are unsure using the registry editor, you might add a step telling them how to exit the editor…there is no save or anything like that – but some might be hesitant just closing the editor after making the change – but that is all that is required. Again – thank you.
Thanks John, correct remark.
I added this to the article ‘At this time already, this entry is physically added to the registry. There is no option to save this ‘document’ as you might expect with other type of documents.’
Thanks for the advice.
Thanks for this great set of instructions – I have used them previously and they worked perfectly. This time however, not so much… the new DWORD does not seem to have any impact and the files are still exporting as low resolution images. This also happens on my work computer so I am wondering if there is another setting somewhere that restricts/ignores changes made in the regedit?
Hi Dayna,
Would it be possible to export the specific registry setting to a file and post its content here?
Sure but how do I do that?
Open the registry and go to that same folder that you used. At the left pane, right click the Options folder and choose to export from the popup menu. Set its filename and save it to e.g. the desktop. Optionally you can change the default file type of .reg to .txt. Afterwards, you open the file with a text editor like notepad and copy the content and paste it in here. Clear?
Thanks – here it is…
Windows Registry Editor Version 5.00
[HKEY_CURRENT_USER\Software\Microsoft\Office\16.0\PowerPoint\Options]
“AppMaximized”=dword:00000000
“Top”=dword:000000e7
“Left”=dword:000000b0
“Bottom”=dword:000003d2
“Right”=dword:00000650
“ToolbarConfigSaved”=dword:00000001
“ExportBitmapResolution “=dword:0000012c
I see a space at the end of ExportBitmapResolution ”
Remove that space and it will probably work correctly.
You my friend are AMAZING! Thank you 🙂
I know Dayna. Thanks for the confirmation:-)
Straight forward! Thank you so much!
Can you help me out whats going wrong here?
Windows Registry Editor Version 5.00
[HKEY_CURRENT_USER\Software\Microsoft\Office\14.0\PowerPoint\Options]
“Top”=dword:000000c5
“Left”=dword:000000c5
“Bottom”=dword:000002f1
“Right”=dword:00000497
“AppMaximized”=dword:00000001
“ToolbarConfigSaved”=dword:00000001
“OptionsDlgSizePos”=hex:48,03,00,00,ad,02,00,00,e8,00,00,00,2a,00,00,00,00,00,\
00,00
“ExportBitmapResolution”=dword:0000012c
This was a really helpful article that was easy to follow and worked perfectly. Thank you!
Appreciated David!
Can you confirm that you are running PowerPoint 2010 on this computer, Mustafa?
Hello, I followed your instructions and notice that when I close BitMapResolution for DWord 32 bit and reopen to ensure it was saved, that it reverts to hexadecimal and 12c, but when I click on decimal it is set to 300. I then create an image out of the Powerpoint “shapes” option, click “slide show”, click “print screen”, paste on to a new slide, then click “save as a picture” (jpeg). Under “details” of the “properties” window of the newly saved jpeg, it displays 1975 pixels x 1975 pixels. When I load the new jpeg on to a web site, (reducing the size to a U.S. dime on the screen) the resolution is very poor. Are you able to see the error of my ways and help me find the solution? any advice would be very much appreciated. Thanks
Steve, 2 comments.
1. No need to start the slide show and then take a print screen. There is an easier option. With your presentation open, click File, Save as, and set the type of e.g. JPG and then export one or all slides. That’s how I would use it.
2. So you have an exported image of 1975×1975 pixels. Depending on your needs and output monitor, that is considered as high-quality already, definitely good quality. So when you insert this on your website and it shows low-quality or blurry afterwards, then there is probably nothing wrong with the image itself and then you have to look into the website specific information. Do you have something compressing images on that side? Save the image again from the web browser and check out its resolution. Should be the same 1975×1975 when uncompressed. Is it?
Hello, Thanks for the prompt and thorough response. I am experiencing a new problem. Today before I attempted your suggestion #1, I checked the previously saved image properties and found it was now at 632 pixels x 632 pixels, so I attempted to follow your suggestion to save the image from one slide. I got as far as clicking “file”, “save as” , “browse” to locate “file name” and “file type” “jpeg file interchange format”, but am only able to see where I save the entire Powerpoint file instead of a single slide. So, I reverted to my old way of clicking “slide show” click “print screen”, paste on to a new slide, then click “save as a picture” (jpeg). Under “details” of the “properties” window of the newly saved jpeg, it still displays 632 pixels x 632 pixels & 96 dpi. When I right click the image slide in Powerpoint and click ” “size and position” then “format picture”, displayed is height – 6.58″, width 6.58″, scale height 67%, scale width 67%, “lock aspect ratio” is checked, “relative to original picture size” is checked, “resolution” is ghosted with 640 x 480, original size – height is 11.25″, width is 20″. Could any of these settings be impacting my final product?
Regarding your suggestion #2, I am using a 3rd party infographics web site (see link below) where I am wanting to import an image and adjust it to fit into provided templates. I am able to select media from my computer and the selected images are dropped into the template where I reduce the large (8″x8″) image down to approximately 1/4″. Once the image is sized down to about an inch, it loses recognition, becoming just a blur.
Thanks in advance for any guidance that you may provide. I apologize for the long winded description but I wanted to be thorough and not waste any of your time. Best, Steve
Steve, one step back to the correct save as process. You are almost there. Just set it ‘save as a picture (jpeg)’ and hit the Save button. After that, it will ask you if you want to export the current slide only, or all slides of a presentation. When you choose all slides, then it will create a new folder at your location, with files named slide1, slide2 etc. Try to do that first, so that we have a good and clean start.
If your picture is a square picture (632×632) then the output of the save action should be square as well. Maybe try to get the save as done correctly and then retry. Maybe you can send in the picture as well, or a link to it, so that we can confirm that the outputted image is correct. Also let me know if a resolution of 632×632 is high quality enough for your needs. Note that 632px is way to small for a full screen image or poster. But maybe you are using a smaller medium…
Hello, Thanks for your continued support on this matter. I seem to be missing something in your instructions and can’t solve it on my own. Whenever I either right click the art work on the slide displayed on the screen or click on the thumbnail slide in the left column, I don’t have the “save as a picture” option. If I select a thumbnail slide in the left column then click “file” then “save as” then “browse” then select the folder I wish to save the slide in then select “file type” then “jpeg file interchange format”, it saves the entire presentation. This is probably why I developed the habit of clicking “slide show”, then “print screen”, then paste on to a new slide, then click “save as a picture” (jpeg). What am I missing? I am using Windows 10 Home with Office 2016 on a 64 bit operating system, if that helps?
The following link is an example of what I am trying to achieve on the third party infographics site where the red, yellow and green logo/icons lost their resolution when reduced in size.
https://www.easel.ly/create?id=https://s3.amazonaws.com/easel.ly/all_easels/3667741/1522873482&key=pri
The following link is of a PowerPoint presentation where the odd numbered slides are the original art work and the even slide numbers are of a “slide show” “screen shot”.
https://www.dropbox.com/s/ib8fi3ym3hc6f7n/OmniVu%20-%20uVu%20-%20test%20jpeg%20resolution.pptx?dl=0
My ultimate goal is to be able to quickly save each of my original art works from Powerpoint in jpeg and have the professional quality resolution that you have described in your article. I often need to adhere to various web site requirements and the need to reduce or increase the art work size (in appearance) depending on the desired project while retaining the highest quality resolution.
I am determined to solve this riddle and am hoping that you are able and willing to guide me in the right direction. I have reached a point of frustration but I must conquer the beast.
Best regards, Steve
You wrote: “It saves the entire presentation”. That does not seem to be true. Is it? I get a question then ‘Which slides do you want to export?’ with the options ‘All Slides’ or ‘Just This one’.
That is the only way to export high-quality images! Try that and check out the resolution of the saved image.
Hello, You are a GENIUS! Once I select my single slide from the left thumbnail column, I click “file” then “save as” then “browse” then “file name” then “file type” then “save” then “confirm save as” then I am asked “which slides do you want to export?”, I then have the option of “all slides” or “just this one”. After saving “just this one”, I checked the resolution and I now have 4000 x 2250 with 300 dpi. WOW! Now if I can learn how to export just the newly cropped picture on to a web site so the white background of the slide is not visible but just the desired image of the icon itself, I’ll feel like a Pro. Thanks for your patients in helping me address this challenge of mine. Enjoy the rest of your weekend.
That resolution sounds much better indeed. That is what people call high-resolution pictures. Great to read that it is working now for you. Have a nice weekend too, what rests of it.
Great explanation! For once a positive experience of following instructions step by step and not running into a problem! Thank you, it helped a lot!
I have a problem when using your way.
I’m using powerpoint 2013. And in Registry Editor window, I cannot find a folder “option” in “Powerpoint”.
There is only a folder “Addins”.
I try creating a “ExportBitmapResolution” in it. But it doesn’t work.
Could you please give me advice?
Thank you.
Hi Ngoc, can you have a look if you maybe find the Options group via Computer\HKEY_CURRENT_USER\Software\Wow6432Node\ and so on?
Does this work with Mac? I have MS Office 365 installed.
Hi Sarah, no sorry, that is for Windows only. Not sure about Mac.
Thanks so much, my files now have clear images
Thank you for the great article! Is there a way to set a custom resolution when exporting images from PPT to JPEG? I saw on Microsoft’s post that you can set various decimal values, but I’d like to export my slide as 900 x 300 pixels and am not sure how to do that..
Thank you!
Maybe you need this. You can enter an explicit pixels value as slide size in PowerPoint. See this applied in this article: https://presentationpoint.com/blog/maximum-powerpoint-resolution/
So my advice: set your slide size to your picture format already before you start designing and exporting. OK?
thank you so very much, your instructions were so on point, got it right without any trouble!!
Appreciated your feedback Uzma!
I have follow all your instruction but it seems that the resolution is still the same 🙁
If you want you can create a trouble ticket in our system and exchange some screenshots!
Thanks! By the way, with current day printers, a value of 1200 is not at all out of order.
I managed to get from 96 to 150 dbi. No matter what I’ve set, 300 dbi, I get pictures with 150 dbi. Thanks.
What is your version of PowerPoint?
Can you export your registry settings (just that part) and paste it here?
PowerPoint 2016
Windows Registry Editor Version 5.00
[HKEY_CURRENT_USER\SOFTWARE\Microsoft\Office\16.0\PowerPoint\Options]
“LastUILang”=dword:00000407
“AppMaximized”=dword:00000000
“Top”=dword:000000bf
“Left”=dword:00000072
“Bottom”=dword:00000419
“Right”=dword:000006b0
“ToolbarConfigSaved”=dword:00000001
“RulersVisible”=dword:00000001
“OptionsDlgSizePos”=hex:b6,03,00,00,ad,02,00,00,74,00,00,00,2d,00,00,00,00,04,\
00,00
“ExportBitmapResolution”=dword:00000133
Thanks. I see that you have used value 307 instead of 300. But that should work too. 307 is the maximum value.
Tell me: what is your slide size? So when you have e.g. 10″ width, you don’t end up with an exported image of 3000 px of 3070 px, right?
There seems to be a maximum on the pixels, being 3072. Are you hitting that? What is your slide size?
I tested slide 2362×1773, 300 dbi and got 2362×1773, 150 dpi.
It is the same with 307 and 300 dpi.
So you know how to set your PowerPoint slide size to 2362×1773 pixels, right?
I did so and exported with 300dpi. Result is a JPG of 7381×5541.
Then I lowered to 150 dpi. Export happens now at 3691×2770.
Is not it like in MS Word: scale?
Do I have to do something else?
Scale? No, scaling is something different.
You need to start with a proper slide size. That reflects how big the slide, and later on the image is.
https://presentationpoint.com/blog/maximum-powerpoint-resolution/
Do you have a workaround for the Mac version of PowerPoint?
Hi Joe. Sorry cannot test, but about this: https://www.slidemagic.com/blog/2017/11/27/how-to-export-powerpoint-slides-as-high-res-images-on-a-mac.
And there is another suggestion via PostScript: https://www.graceunderthesea.com/thesis/save-300-dpi-figure-from-power-point-on-mac
Let me know if one works.
Hi, Any idea where I set the ExportBitmapResolution value when using Office 365 installation of PowerPoint?
There appears to be no [version number]\PowerPoint\Options keys under HKEY_CURRENT_USER\Software\Microsoft\Office
For example no folder key tree such as [HKEY_CURRENT_USER\SOFTWARE\Microsoft\Office\[version number]\PowerPoint\Options
Thanks…
Sure. That is the same as Office 2016 so 16!
ok. Thought as much. But the tree as follows doesn’t exist!?
HKEY_CURRENT_USER\SOFTWARE\Microsoft\Office\16.0\PowerPoint\Options
I only have:
HKEY_CURRENT_USER\SOFTWARE\Microsoft\Office\PowerPoint
I’ve tried creating the missing keys “16.0\PowerPoint\Options” to build the tree the same, and then the DWORD value, but that doesn’t work. Still exports at the default resolution.
Any thoughts?
Strange. And what about HKEY_LOCAL_MACHINE?
Or search for the key named ‘ssendonblankslide’. Where do you see that in your registry?
No key named ‘ssendonblankslide’
Under HKLM, just these trees that relate to PowerPoint / 16.0:
[HKEY_LOCAL_MACHINE\SOFTWARE\Microsoft\Office\16.0\Common\OEM]
&
[HKEY_LOCAL_MACHINE\SOFTWARE\Microsoft\Office\PowerPoint\Addins\PDFMaker.OfficeAddin]
Bit of a mystery!
Strange. Maybe try your luck here: https://answers.microsoft.com
Sorry that I can’t help you directly. Curious what is it. Feedback is welcome.
Thanks for the input on this.
Update: This was resolved for me by re-installing Office 365
This populated the necessary registry sub-keys. It transpires quite a few were missing. Perhaps as a consequence of Office being pre-installed by the laptop manufacturer, which I then licensed.
I was then able to locate the sub-key:
HKEY_CURRENT_USER\Software\Microsoft\Office\16.0\PowerPoint\Options
And add, the necessary DWORD to enable the high resolution jpeg/tiff output.
More details here on the MS site about reg settings and resolutions, etc, for this:
https://support.microsoft.com/en-gb/help/827745/how-to-change-the-export-resolution-of-a-powerpoint-slide
Good news for you! Thanks for the feedback!
thank you so much, saved so much of my time figuring this out
thanks a lot !!!! helps a lot!
thanks a lot!!!! it really works! this is the best online instructor ever!
THIS WAS SOOOOOO HELPFUL!!!! THANK YOU!!!
Thank you very much, this help me to export a big collage that I was making on power point.
Thanks a lot. Worked wonderfully for me. Saved me a lot of hassle.
Thanks for the feedback James!
THANK YOU SO MUCH FOR THE ARTICLE..IT HELPED ME WITH MY DOCUMENTATIONS .
This is simply great! Thank you for the clear instructions and wonderful advices. It helped and will help too. Thank you again!
Thanks for your feedback! This made my week!
Thank you so much!!!
Hello I am using MS Office 2016 Home and Student 2016
But couldnt find the registry key sub folder ‘office’ in Computer\HKEY_CURRENT_USER\Software\Microsoft\Windows at all.
I ant to change the settings in registry as per your tutorial to save slides in high resolution jpeg. But unable to find the registry entry :(. Pls help!!
Try to do a full scan on the word ‘ssendonblankslide’. Do you find it? Where? What is the path?
No : ( Couldnt find “ssendonblankslide”
Sorry, never seen this before. Try to post your problem here in the PowerPoint section: answers.microsoft.com. There are some PPT experts watching there.
Hello there is a good news !!!!! I re-installed the office 64 bit version. I presume ,earlier the default version was installed.
After re-installation , i checked the registry, the required path was available. !!! Happy ME :). I made the changes accordingly and now it is perfect.The exported slides are now @ 300 dpi.
Perfect! Great news for you. Now you can start exporting images at 300 dpi 🙂
Could I send you one ppt slide (117MB) for you to convert into High Quality JPG file? I will use Walmart Photo Center to order wooden plaque. They require JPG file, but did not specify dpi. Can I assume that 300 dpi is good enough for 8 x 10″ plaque? Give me your quote.
You can do it yourself by using PowerPoint. But sure, send in your file and we will send back the jpgs free of charge. No problem with a one-time action.
Any chance you can offer a similar tip for a Mac user?
No sorry. Not that I know and not able to test.
one of the BEST SHORT ONLINE GUIDE ever !!!!!!
thanks a lot!
Thanks Alex!
Hi Admin, I had set the ExportBitmapResolution decimal value to 300, when i exported my picture in PowerPoint to TIFF file, the property showed 150 dpi. Can you help me with this?
Can you first check our blog article info and screenshots, if it is working with JPG images?
My office version is 64 bit, should my DWord key still be 32, or should it be 64? Regardless, I can only get 150 dpi. I have a page of photos/art grouped together on a single page that I try to save as a single jpg. The save works, but still only 150.
The dword itself should be 32. Can you give that a try and let me know?!
Thanks a lot. I was facing this problem for my research work images. Your post is a big help.
Glad to read that! Have a nice day.
Thanks a lot Sir it work like a dream for me.
Super. Like your feedback too:-)
Hi,
Thanks for the guide. Is there a way to get this to work when you save powerpoint objects as images i.e. when you right click an object as click “Save as Picture”. I tried the above and it doesnt seem to increase the resolution when using Save as Picture on a powerpoint object – is there a way to make it work for the “Save as Picture” option?
Thanks
No sorry. not that we are aware of. This only applied to JPGs when you export the slides.
Hi everyone,
How can I change my image resolution with ppt 2019 ?
Since it’s an application, there is no regedit
and it saves my images in 96ppp
Thank you in advance
Bonjour Stephan, how do you mean there is no regedit? Regedit is a tool of your Windows operating system. It is available on every system.
Thank you very much !!! It works for me 😉
Super good news for you!
hello, can you help? i went to regedit as instructed and it just shows software > microsoft > accessibility please help i need to submit a ppt soon
Sure we can look into that. Please create a personal trouble ticket at https://presentationpoint.com/support/ and send in a screenshot of what you are seeing.
Hi, such a resourceful site. Glad I stumbled on this. My son Elijah is working on a thumbnail pic for his YouTube channel (he’s a 17-yr old musician) & the end result resolution was dropping. I searched for PowerPoint alternatives, then found your solution. Took your “do not compress images in the file” option. If need be, will use the “regedit” option too. Thank you so much.
You are making me happy too Evelyn! Thanks for making time for your feedback.
Life saver…..Thank you so much 🙂
Hello, Thanks for the tutorial. I have office 365. I have various subfolders – 11.0, 12.0, 15.0, 16.0 AND 8.0. only the 16.0 have the subfolders mentioned as the right path, so I have creates the new entry, restarted and nothing changed. I see the new entry on the registry but when I open it it says hexadecimal 12c. When I am changing it again to 300 decimal it stays Hexa 12c. Any suggestions on how can I overcome this problem? You are the best! thanks in advance:)
Dana, the 16.0 entry counts for PowerPoint 2016, 2019 and Office 365.
Hi! I’m using Office365 and I’m having the same issue as Dana. I’ve found the file location and followed all the steps but the value data reverts to 12c hexidecimal anytime I save.
Please help!
Hi Evelyn, I think that that is normal. Internally in computers, everything is stored as hexadecimal numbers. So your 300 decimal is translated into 12C hexadecimal. Every time you open it, it will show 12C hexa again. So far this is a not a problem I think.
This is an excellent page – great step by step guidance and help.
In my current version of Office (or maybe it was due to a recent Win10 update), the folder path has changed. PowerPoint is no longer under Software\Microsoft\Office.
You can find the new location by doing a registry search for “RecentAnimationList,” which is a sister folder to Options. (Obviously, searching for “PowerPoint” or “Options” will take forever.) I found only one instance of that folder in my registry. Then just click over to Options and proceed as above.
Thanks for sharing Ben. Can be helpful to others.
Excellent explanation
Thanks Sandra!
Many thanks – it worked for me. Very straight forward solution.
Great! Thanks for your feedback Martin!
Thanks
OMG you are the best
Does this process work for Office for Mac as well?
No sorry. These were the instructions for PPT Windows. No experience with Mac.
OMG THIS WORKED PERFECTLY!!!! Is there any way I can donate to y’all or something because you literally saved me from months of frustrating presentations! Please let me know and email me!
That is great news Anthony. Glad that we could help! No need to donate. We try to earn money with real plugins for PowerPoint like our DataPoint for data-driven presentations, our SignageTube for digital signage with PowerPoint. If you ever need that…
Hey, I’m not a tech savvy person so please bear with me. I used your method and converted my slide to jpg. The size now is 949kb as compared to earlier 196kb. Though there is improvement in quality, I still don’t fine it as good in resolution as my slide in PowerPoint. I can go upto 5MB if that helps.
Thank you very much for the above easy guide as well. It was super easy to follow.
Thanks for the feedback. Important to know is how many pixels you have now when you look at the exported file. It sounds like this is 5x the original size.
What do you want to do with the image? Print it? Show it on a television?
If you want to show it on a television, then the quality will not get better if you have more pixels on the image file, than that you can show on the television. See what I mean?
So a perfect fit for your television, without wasting disk space, is when your exported file has the same amount of pixels like you can show on the TV.
I’m using the 2019 version of PPT. After the 16.0 node, I can’t find PowerPoint. I only see the outlook option. Could you please help me?
16.0 counts for PowerPoint 2016, 2019 and Office365!
Many many thanks! It was game-changing for me <3
Super! Great to read.
Hi I want to convert my poster (1 powerpoint slide) to a jpeg/png format with a resolution of 1080 X 1920 (16:9 portrait) 72 DPI. I have tried adding the file size of 38.1 cm X 67.72 cm powerpoint slide. However after exporting as jpeg the resolution of the image is way high. Can you suggest me the proper way of getting the above. Resolution image of the PowerPoint slide without loosing its quality and is readable?
OK, but what did you set a registry setting for ExportBitmapResolution? 300? Try to set that to 72 and export again. Personally I always export with 300 DPI. That is mostly too large, but then I use another tool to resize it to the desired smaller size. That is easier that continuously changing the registry value. Maybe an idea for a new tool we can provide… 🙂
Is that possible to increase the value to 2000?
Sure you can play with the values, but remember, here that value is dpi or dots per inch. And 2000 what you are writing, is then probably the total number of pixels of the exported image.
Really helpful, thanks!!
Thank you a nice and very useful article
Super helpful, well written and it worked ! Great
Nice to hear. Thanks.
Really helpful and very easy to understand. Thank You
Welcome! Thanks for your feedback. Glad it helped.
Thnx bhai..
Thank you so much, you are doing great work.
Great to read. Thanks for the compliment.
Directions were easy to follow. I was able to make this change on the first try. This solved my problem quickly. I really appreciate the help. thank you.
Thanks for the feedback! Glad it helped.
Worked as advertised! Thanks!
GRACIAS !!!!!!!!
Wow thank you! I’m exporting high res figures for research papers and this is life changing ahah. Worked perfectly. Thanks again!
I smile every time that I read a comment like yours. Glad that I could help you with that.
Hello Admin,
This is a very useful and life saving method you shared. Thank you very much. Kindly help me with the following situation:
I have created a poster in the powerpoint 2010 initially with the given instruction of 1500*1061px. Now this slide needs to be converted to jpg or png. I followed your instructions and could successfully do so but the saved image resolution is not 300dpi but 197dpi. Can you please solve this issue?
thank you!!
what about office 365
Sure, that works too with value 16.0 as for PowerPoint 2016. All newer versions of PowerPoint are still named 16.0.
Thanks a lot!! Works great. I changed it to 600 DPI for even better resolution.
It is weird that there isn’t a simpler option to do this..
thanks again!
Worked perfectly. Thank you!!!
You saved the day! Thank you for this information!
Glad that I could help!
Such a important thing
great, works fine, thanks!
Thanks a ton